
Home
Before MOM
Building MOM
Sea Voyages
Land Voyages
Globetrotting
CDs for Sale
Links
Metal Boats
Contact
| |
|
Home Before MOM Building MOM Sea Voyages Land Voyages Globetrotting CDs for Sale Links Metal Boats Contact | |
Why build a new boat?
After doing considerable research and talking with people that had bought used and people who had built their own boats, we decided to build new rather than buy a used boat. The general consensus was that most everything on board a used boat had to be "rebuilt" anyway. By building our boat we would end up with a new "new" boat rather than a new "used" boat. Also we wanted a particular cabin layout that was hard to find in a production boat. Another plus is that we would be extremely familiar with every system onboard.
Doing online researching for a boat we found a Pearson 36 Pilothouse which seemed to have many good features of what we wanted in a boat. Only trouble was they were uncommon (only about 30 of them were built) and were somewhat old (all made in the early 80's) and therefore would need a MAJOR refit to be acceptable. The search continued on.
We researched boats in the summer of 2006 while visiting the Northwest. We looked at quite a few fiberglass pilothouse boats but only the Pacific Seacraft Pilothouse 32 seemed to fit the criteria we had for the interior layout. One problem with this boat is that they are all at least 10 years old and only about 40 of them were made making them not too common to find on the used market. There was one for sale in Bellingham and we got to check it out very carefully. It was 13 years old and looked like it might need all the rebuilding that we had been warned about (new motor, new rigging, new sails, new plumbing, etc.).
Earlier that year we found out about the boat designs from Brent Swain while doing research on the internet. What caught our interests about the design is that it is a custom pilothouse built in steel. The design can be built as either a fin keel or with twin bilge keels. Brent has developed a unique construction method that is called "origami" as the hull is "pulled" into shape. It makes very good use of the strength of steel plate that has been curved. Almost every piece of steel in the boat has some curve in it making it extremely strong.
The heart of this origami boat building is the east coast of Vancouver Island in Canada. This is where we looked at 25 different "Brent Boats" as they are called by their owners. Of the 25 boats we saw, 20 were in the water and 5 were under construction. We even got to sail with Brent on his own boat that he has lived on for 22 years!
The more we saw of these little steel boats the more we liked them. Every one was custom and had a different interior layout. What we wanted was the dinette up in the pilothouse and the galley down below. As the design is custom that would be easy to do as the boat was built. We decided to build the Brent Swain 36 with twin bilge keels.
Our research had also led us to Evan Shaler, a boat builder that specializes in the Brent Swain design. Our boat was to be Evan's 35th hull built! As Evan would not travel to the US for construction we had to find a site for building the boat on Vancouver Island in Canada. We had met Winston & Carolynne Bushnell (DOVE IV) early on in doing our field research. Winston has built three "Brent Boats" of his own (DOVE II, DOVE III and DOVE IV) and had sailed the northwest passage accross the top of Canada in one (DOVE III). Winston agreed to let us use his property on Vancouver Island for the construction of our boat.
What a BIG step to start building a sailboat!
First thing was to locate a small trailer to live in while working on the boat. Finding one in Chemainus we got that moved to the building site. We made arrangements to start construction in October of 2006.
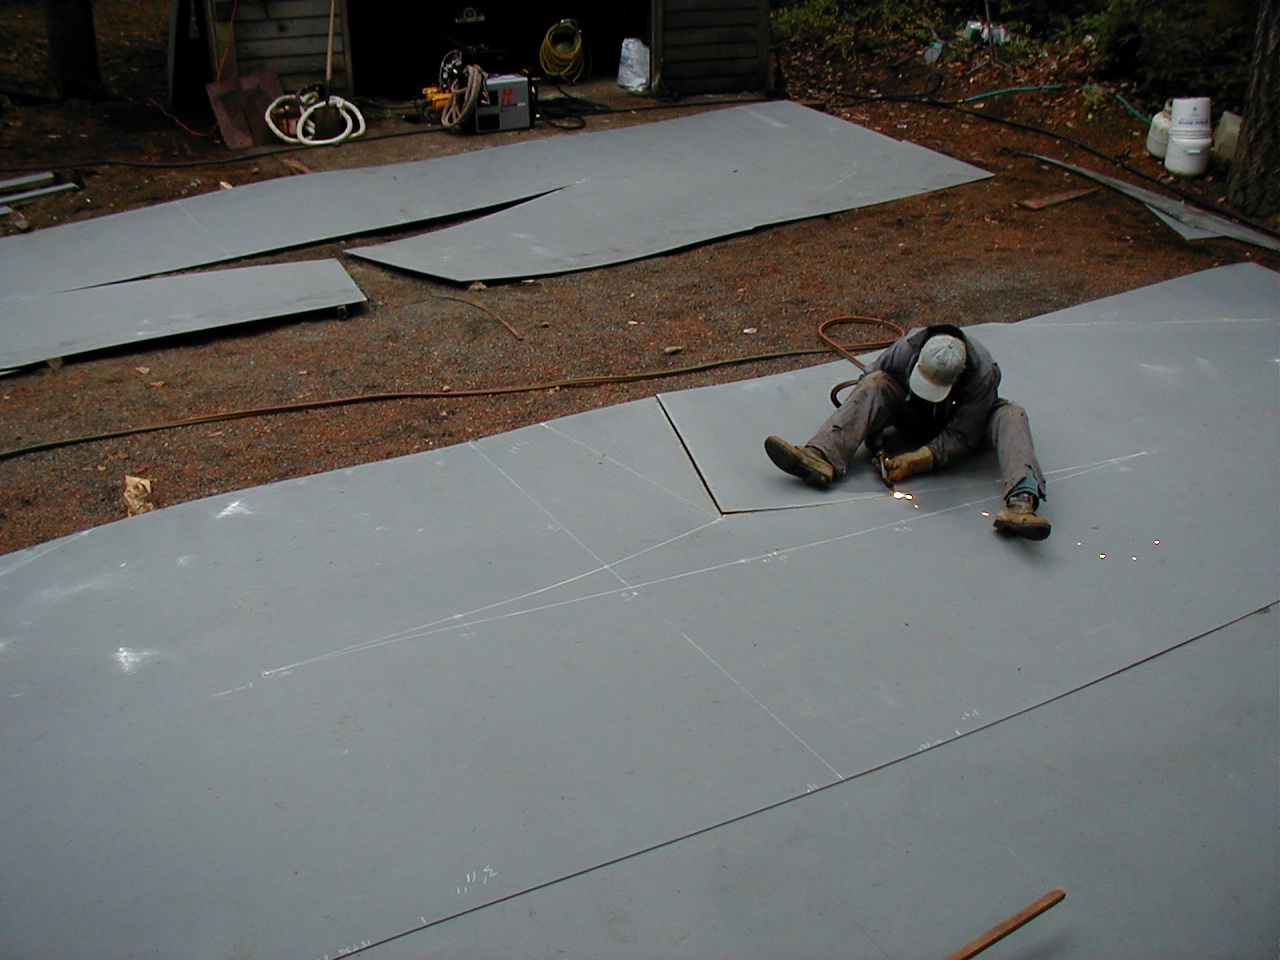
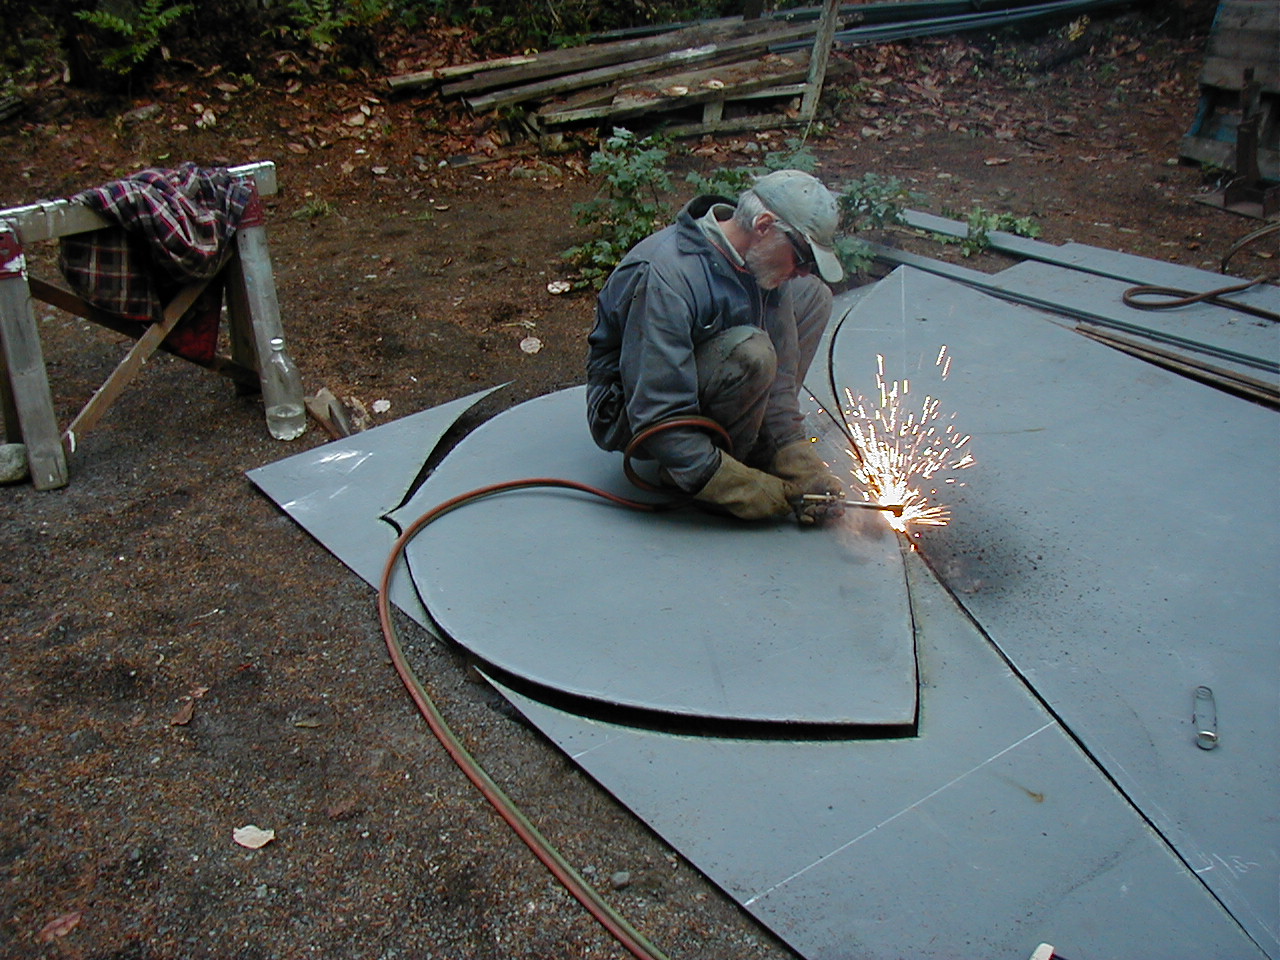
We packed up the truck with everything that we needed and headed to Vancouver Island on October 10th. Canadian customs was more concerned with where the Kokanee came from than anything else. "I've never seen anyone bring Kokanee INTO Canada" said the official. Our steel arrived the first week of October and we arrived from Utah early the next week. First thing after getting settled into the trailer was to organize the steel. The hull plates are 3/16 inch plate (8 feet by 36 feet), the keel sides are 1/4 inch plate with 1/2 inch plate for the bottom. The deck, cabin and pilothouse plate is 10 gauge which is slightly more than 1/8 inch. This amounted to nearly 10,000 pounds of steel to move around and place where it would be needed but not in the way. After getting everything into place to start, the next order of business was to lay out the lines for cutting out the hull plates. The transom and skeg are cut from "scrap pieces" of 3/16 plate left over from the hull.
Evan kept things moving at a quick pace by working under a tarp when it was raining. Talking about rain we managed to build the boat during the wettest month (not just November but any month) on record for the Northwest! We even had over 10 inches of snow on the ground on the 28th. Anyway getting back to the boatbuilding, here is Evan working under the tarp cutting out panels for the fore deck and the side decks. Here he is getting the fore deck pre-fabed. Evan refered to these sub-assemblies as "rainy day projects" and there were a number of them including the skeg, the rudder and two keels.
During two of the "rainy day projects" I drove to Campbell River (about 100 miles north) to get the lead for the ballast. It took two trips as I could only haul 2500 pounds at a time in our truck. Does this look like 5000 pounds of lead?
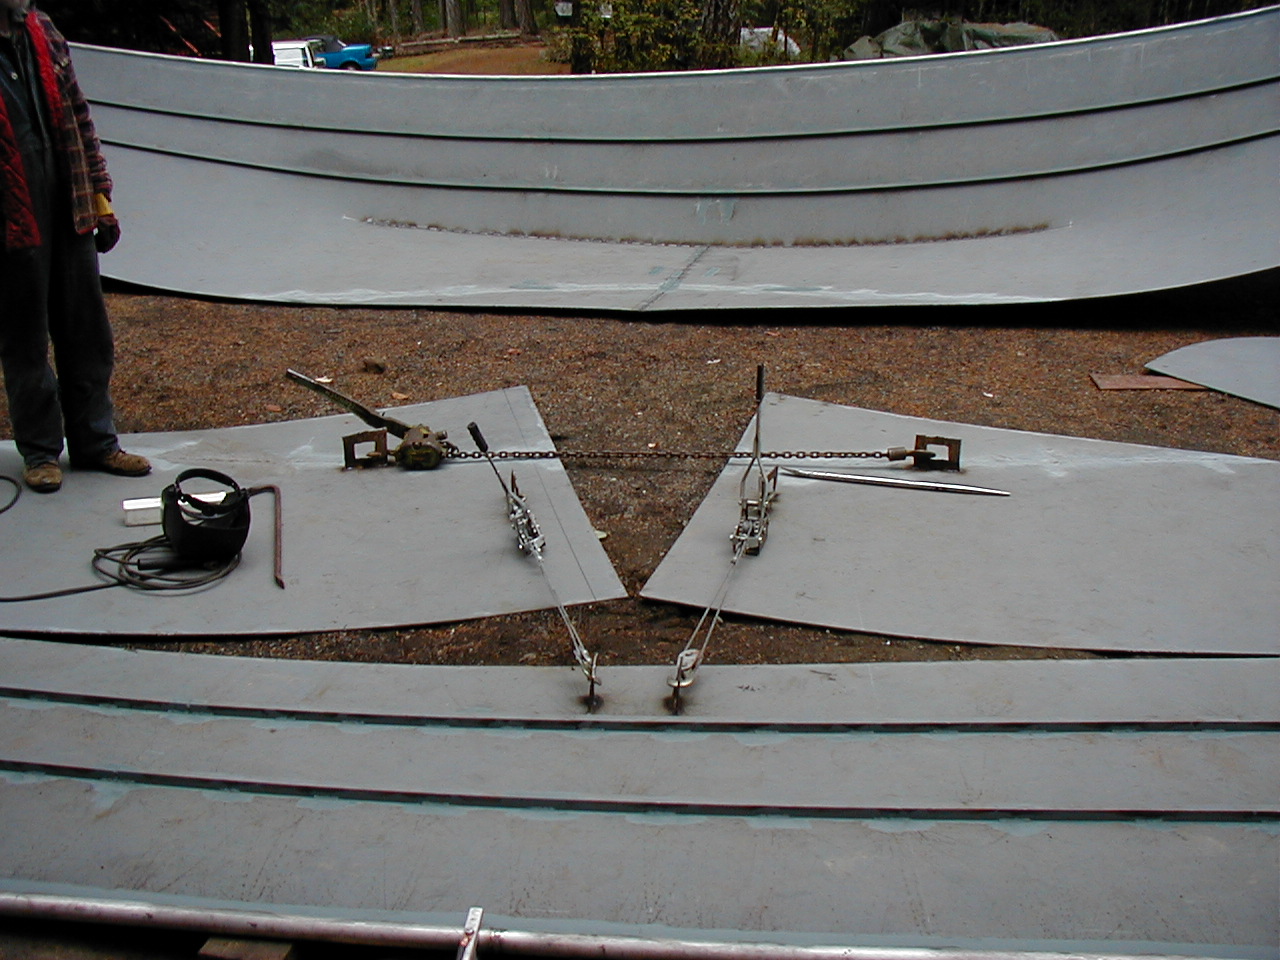
When the weather permitted there was plenty to do with the hull plates to get them ready for "pulling" into half hulls. They needed to have small pieces welded to what would become the bottom, longitudinals of angle stock welded in place and the stainless steel bulwark pipe welded along the top edge. After this the next step is to use several come-alongs and pull each plate into a half hull.
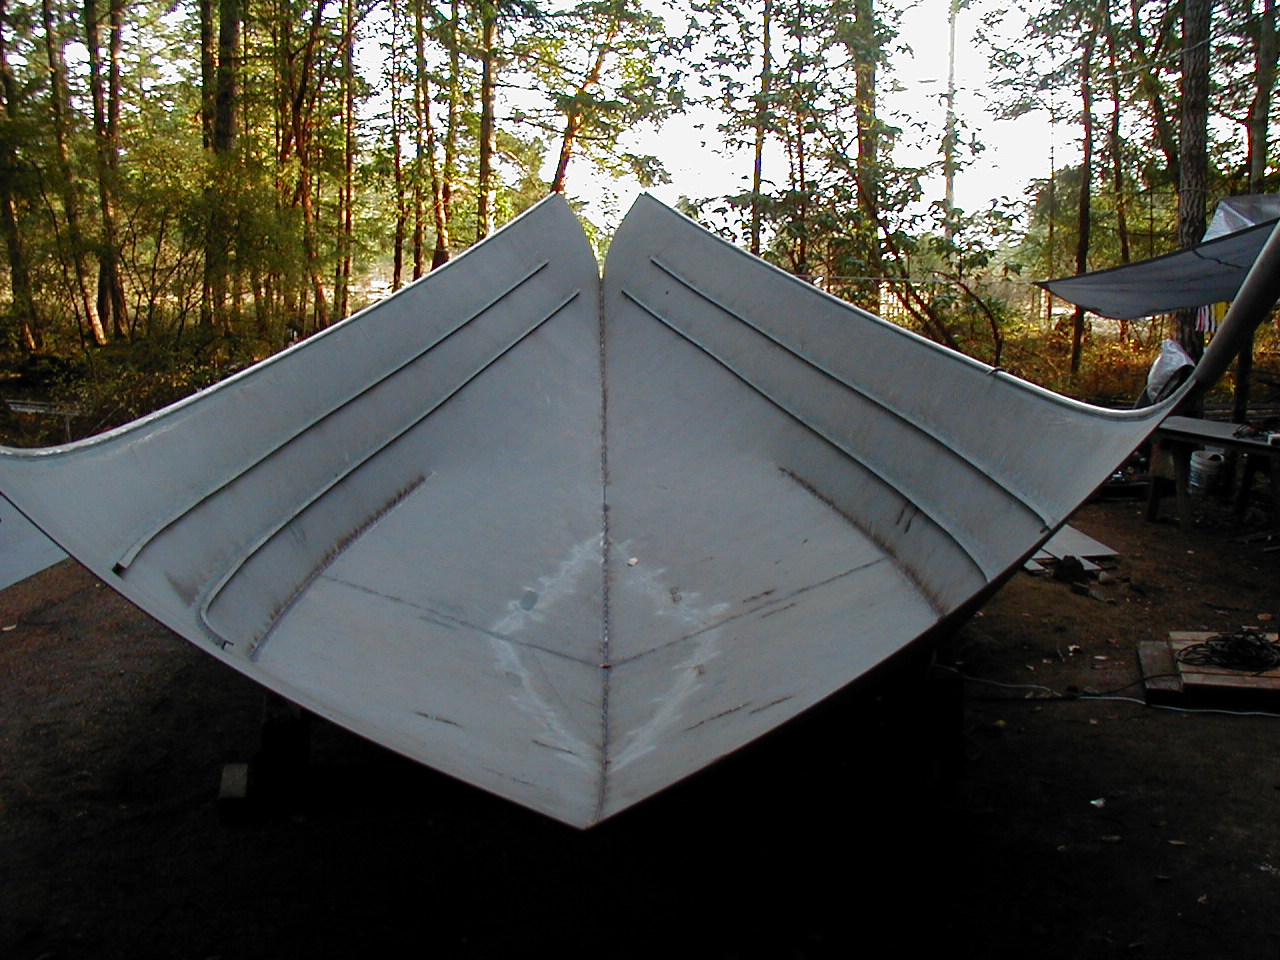
Next step in this process is to pull the two half hulls together and weld them down the center line. After this the transom is installed and tack welded in place then the beam is set using a half dozen come-alongs. Decking is installed next starting with the fore deck and continuing along each side with the side decks.
After installing some temporary bracing inside the boat, the front cabin sides are tack welded to the deck. The cockpit floor is bent into shape with a metal brake and is then fitted to the transom with some additional temporary bracing and then the cockpit seating plates are welded in and trimmed to fit.
Next the pilothouse area was trimmed out in preparation for the pilothouse sides and the transom was trimmed to proper height. Along with the installation of the pilothouse sides came a big decision as to the slope of the forward windows. Lines were drawn and examined to get an appealing angle then the sides were trimmed to the chosen lines.
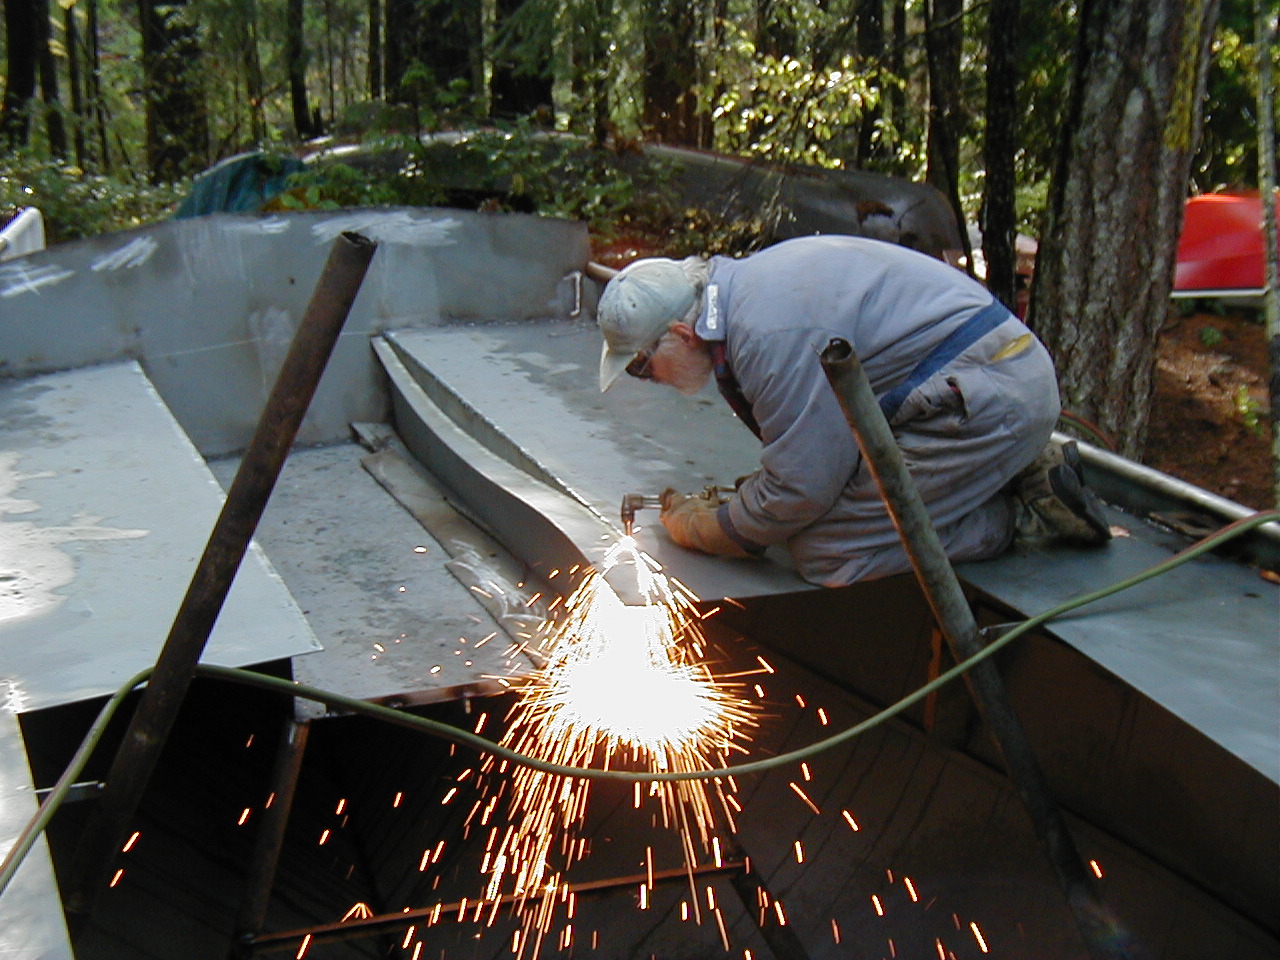
The cabin sides are then completed back to the pilothouse and the top edge is reinforced and cut to a slight arc to follow the shear line. The front of the cabin is tack welded and then cut to fit with the proper arc for the cabin top. This was the first boat that Evan had use of a plasma cutter throughout construction. While he used this for most of the cutting he prefered to use the oxy-propane cutting torch for critical seam cuts such as along the cockpit seats and cabin sides and front.
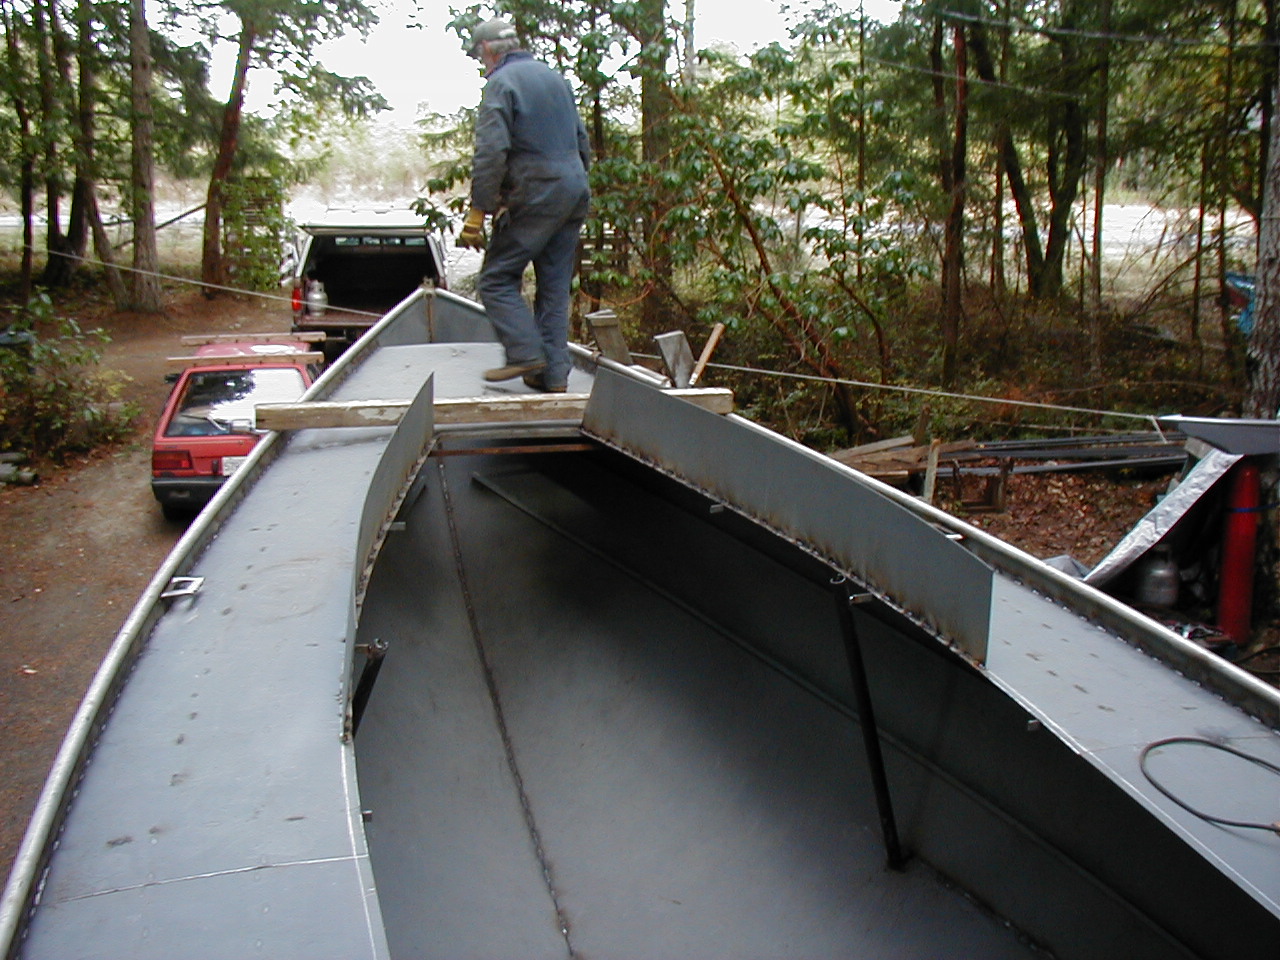
Evan wanted to get as much of the interior welding done as possible before the cabin and pilothouse tops were installed. So the centerline was stitch welded and then extra longitudinals are welded into the bottom of the hull before proceeding any further with the top. A temporary support for the rear of the cabin top is cut to the proper arc and welded in place to support the aft end of the cabin top during installation.
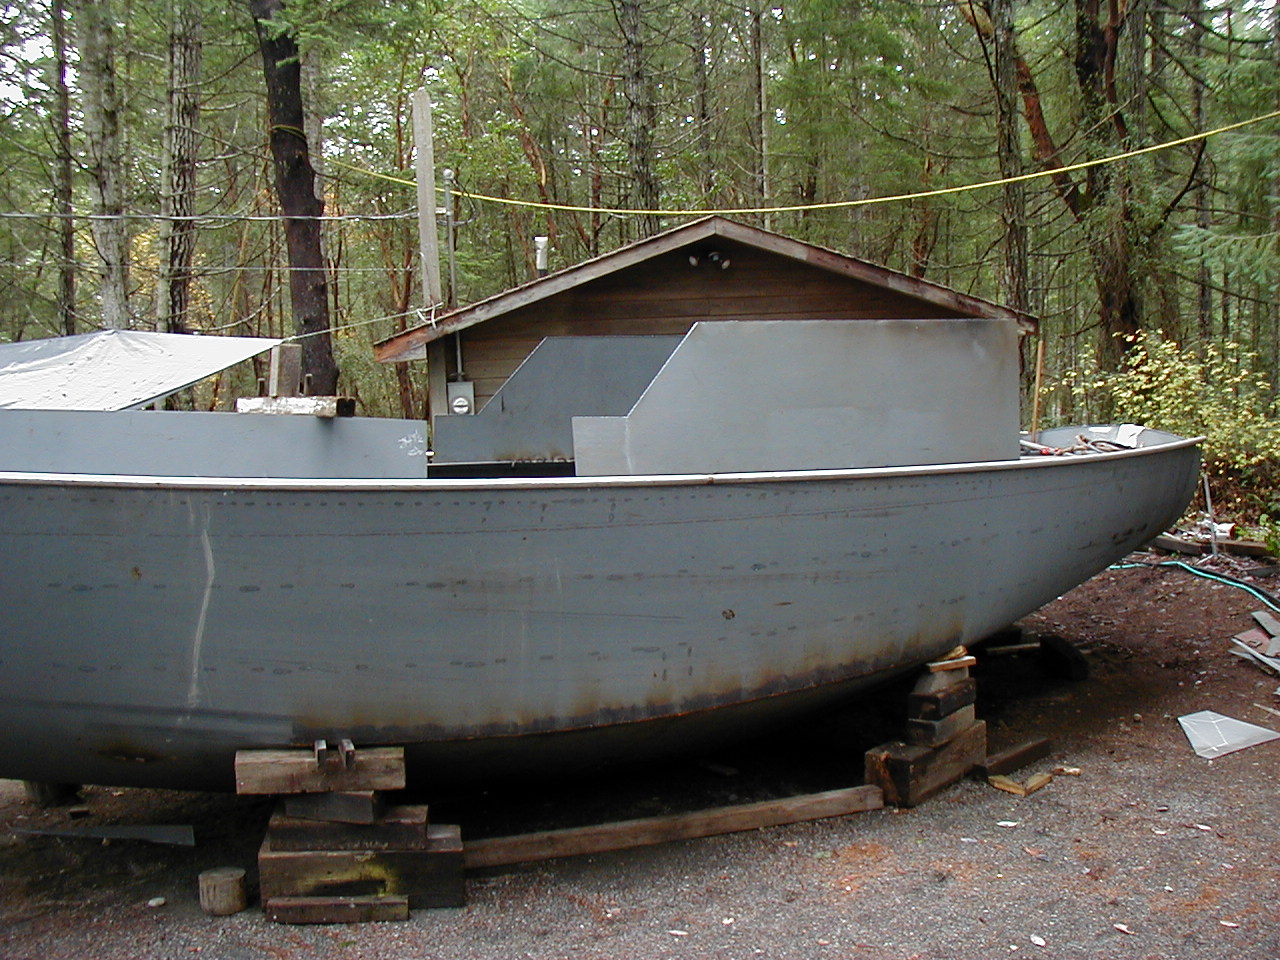
The cabin top is a large (6 feet by 11 feet) heavy (over 350 pounds) piece of 10 gauge plate steel and has to be winched up on top of the boat with a come-along. When in place the cabin top is forced into a curve along the temporary support and cabin front with two come-alongs then tack welded and trimmed to the cabin sides.
Now the three front window panels of the pilothouse are tacked in place and trimmed to a curve for the pilothouse top. At this point in construction we had over 10 inches of snow fall causing us to stop working on the boat for a few days. Look at the difference between Saturday November 25th and Tuesday November 28th. With all the wet weather we had all the "rainy day projects" completed at this point so there really wasn't anything that could be done but wait for better weather.
Evan is working on the boat, weather permitting, while I am working and visiting family in Utah for the month of December. I have heard that one of the largest wind storms to ever hit the Northwest has gone through Vancouver Island earlier this week (December 10 - 16) and electric power has been out. More pictures of the progress of the building will be put up starting in early January.
One month later (2007)
After a very nice December spent in Utah with my wife, friends and family I returned to the boat construction on January 2nd. Evan had got the pilothouse top cut and installed and done considerable welding inside and out during December.
The first item we started on was completing the stainless steel pipe rail around the top edge of the transom as this is a two person job. We had good weather so dong outside detailing is the priority now. The front mooring posts are fabricated & installed in the foredeck. Next is to layout the forehatch opening. The hatch framing is cut and then welded to the cabin top before cutting the opening to prevent any distortion in the steel. Evan did a little more interior trimming and welding when the weather turned wet again.
My next order of business was to take the ferry accross and meet Kate in Vancouver then drive to Seattle to pick up our engine from Klassen Marine Engines. It is a 52 horsepower Isuzu with a ZF 25 marine transmission. Here is a picture of fitting it back into a shipping crate.
After returning to Yellow Point and the boat project we had some more snow to shovel. Then we chalked in the window openings to get a look at what they would look like and decide how many and how big to make them. Winston gave his opinions regarding size and placement of the pilothouse windows.
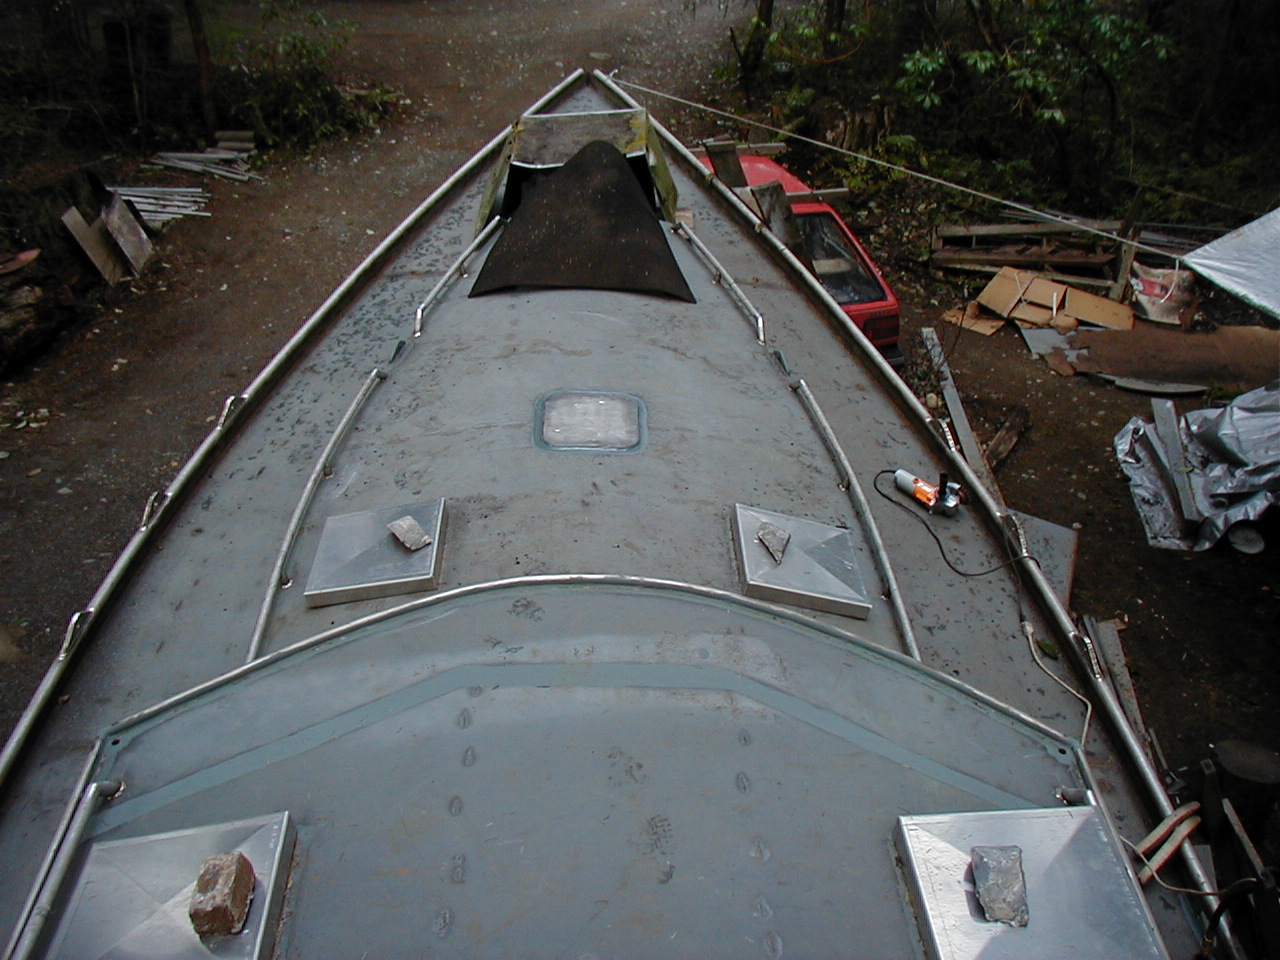
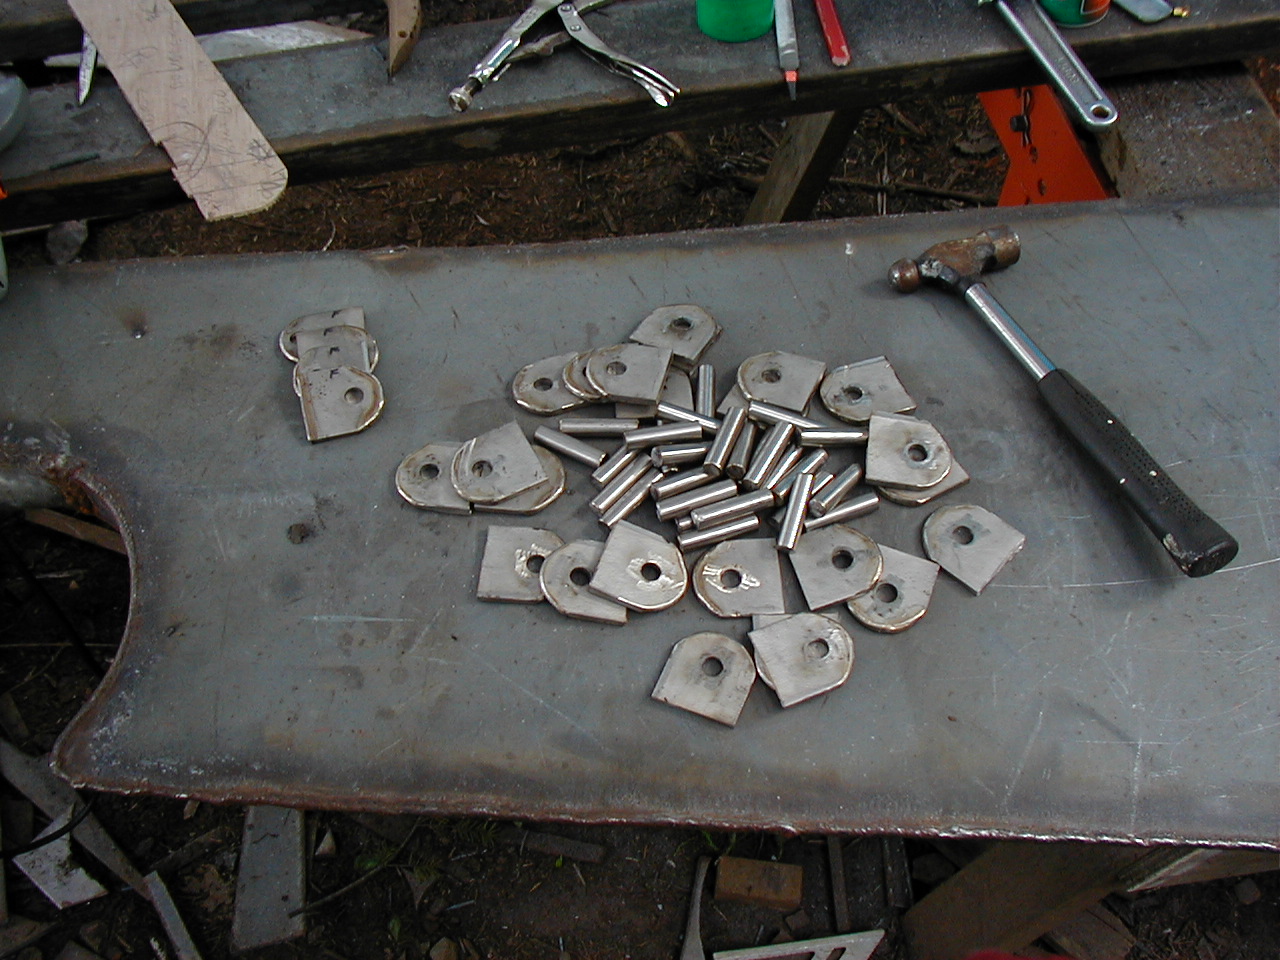
With some dry weather Evan cut out the forehatch opening and finished welding the frames in place. Next was completing the outside welding of the bulwark pipe and transom top pipe. A decision as to the placement and number of ventilation hatches was made and four were decided upon, two on the cabin top and two on the pilothouse. Evan cut the frames and welded them in place before cutting the openings in the cabintop ANd pilothouse.
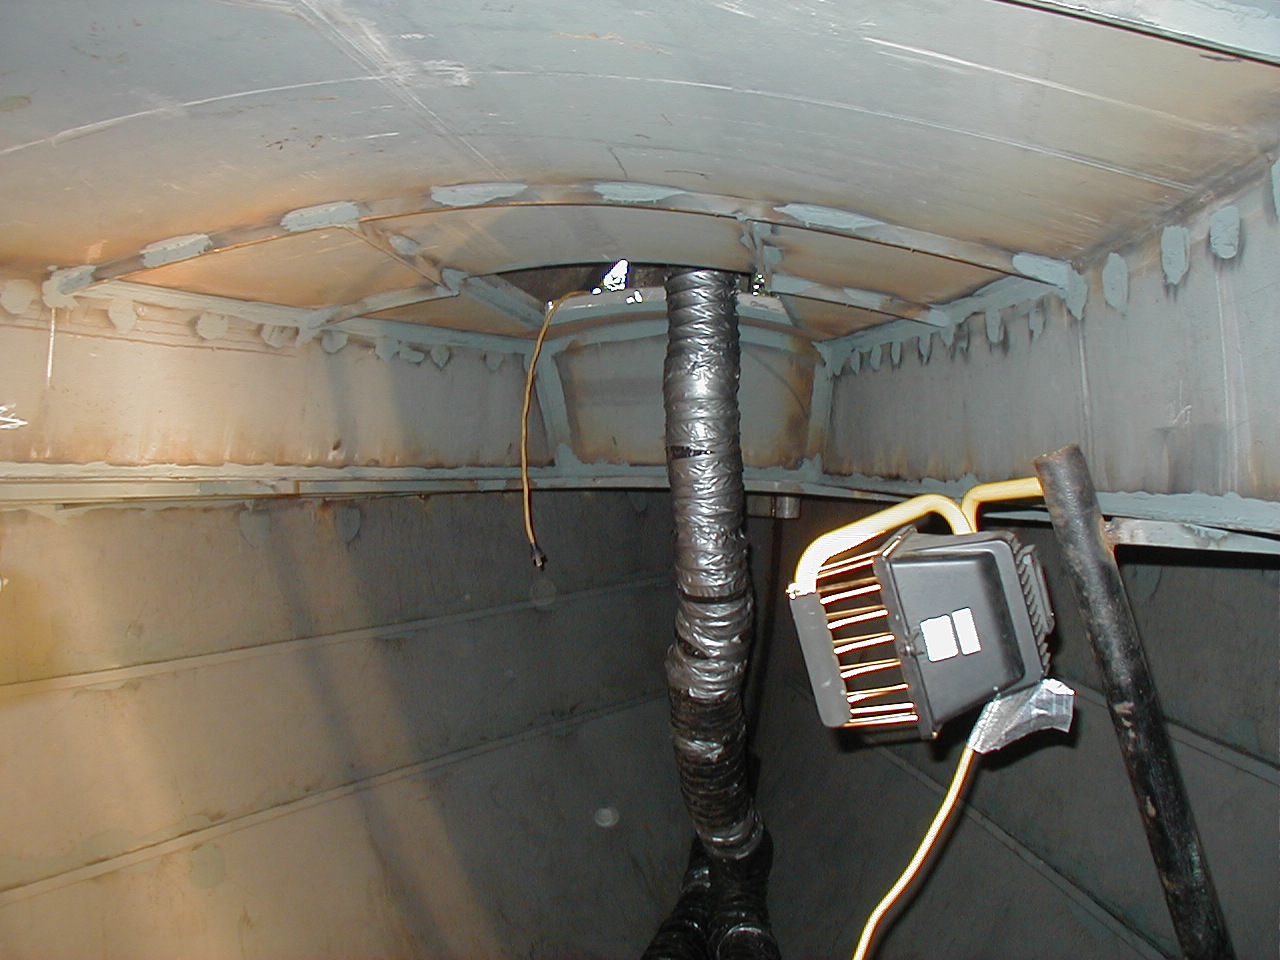
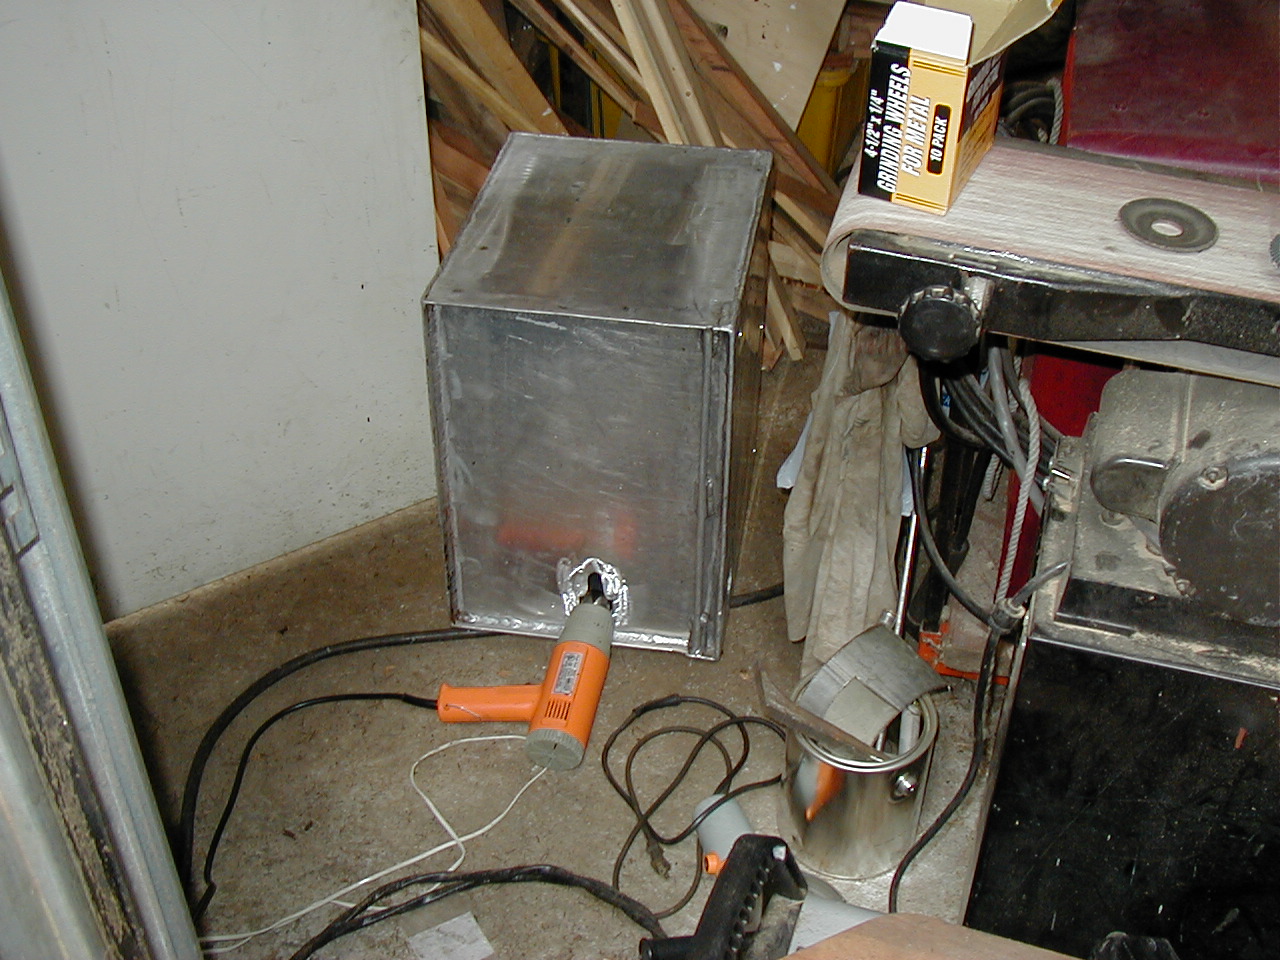
We had a lot of rainy weather and did welding inside of the boat during these days. Evan has a "smoke sucker" (shown here with some of the temporary framing to stand on) that is used to keep the air inside the boat fit to breath. The picture here shows the welded area after cleaning and priming (with the "smoke sucker" coming in through the forehatch).
With the return of some drier days, the stainless steel pipe trim around the edge of the pilothouse was tacked down and finish welded. This edge also acts as a water catchment and funnels the caught water down two 1/2" stainless pipes, one at each front corner of the pilothouse roof. My job, recently, has been to get the outside weld of the bulwark and transom pipe ground and primed.
Two weeks later
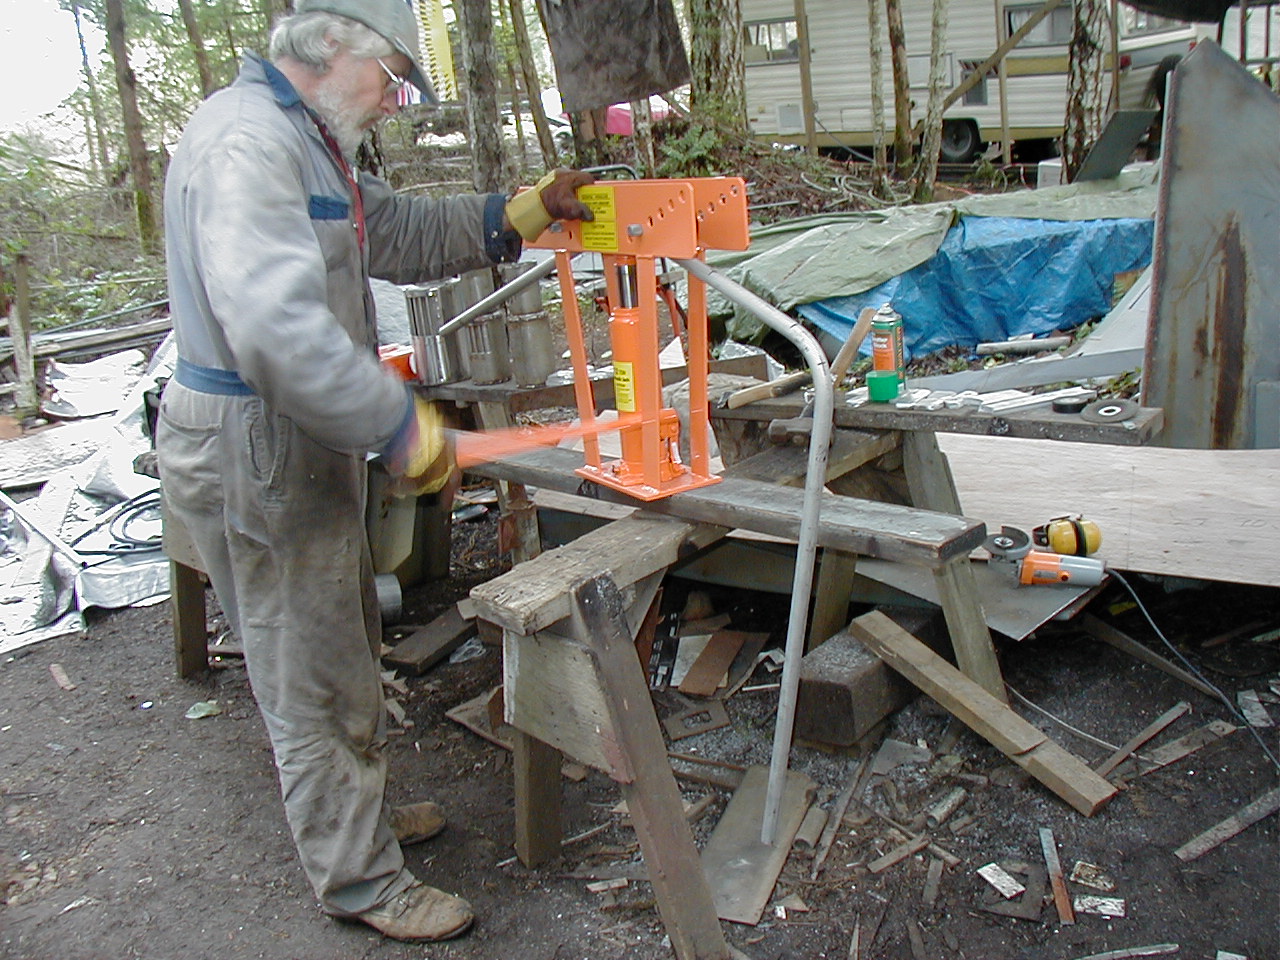
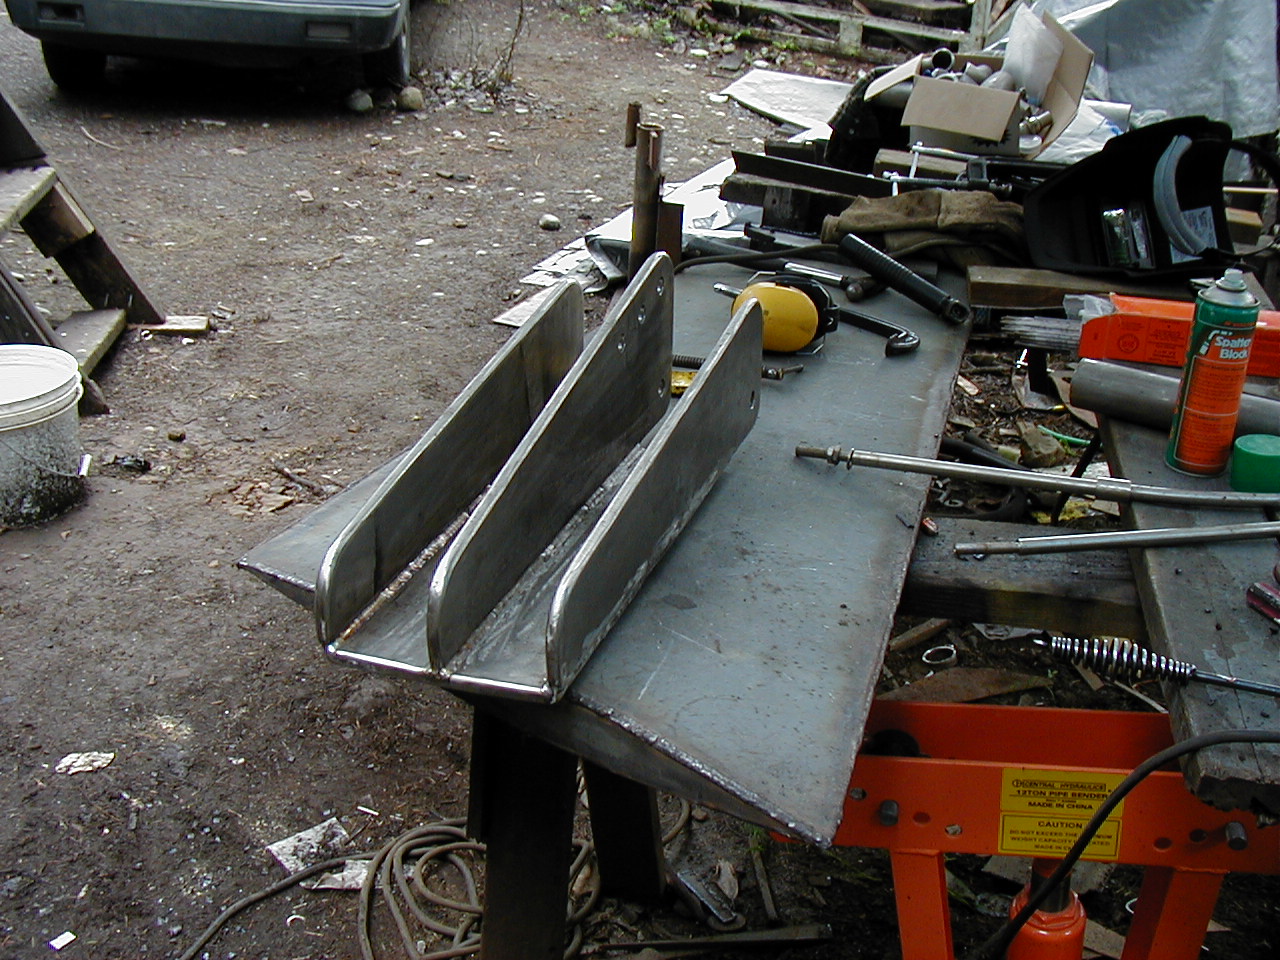
Lots of little things have been happening on the boat during the last two weeks. Most of all it is getting the stainless steel detailing items made and installed onto the boat. While I went into Nanaimo to pick up some more steel plate (about 1000 pounds worth of 1/4" and 1/2" steel), Evan made and installed the fore peak. Next Evan bent up the fairleads for the rear mooring bits. Here is a picture of the fairleads installed with the inside welds ground. Then the mooring bits are made from 3" pipe and installed in the rear deck. The bottom of the bits have a plate attaching them into the hull as well as a 1/4" doubler plate welded just under the deck and attached to the hull too.
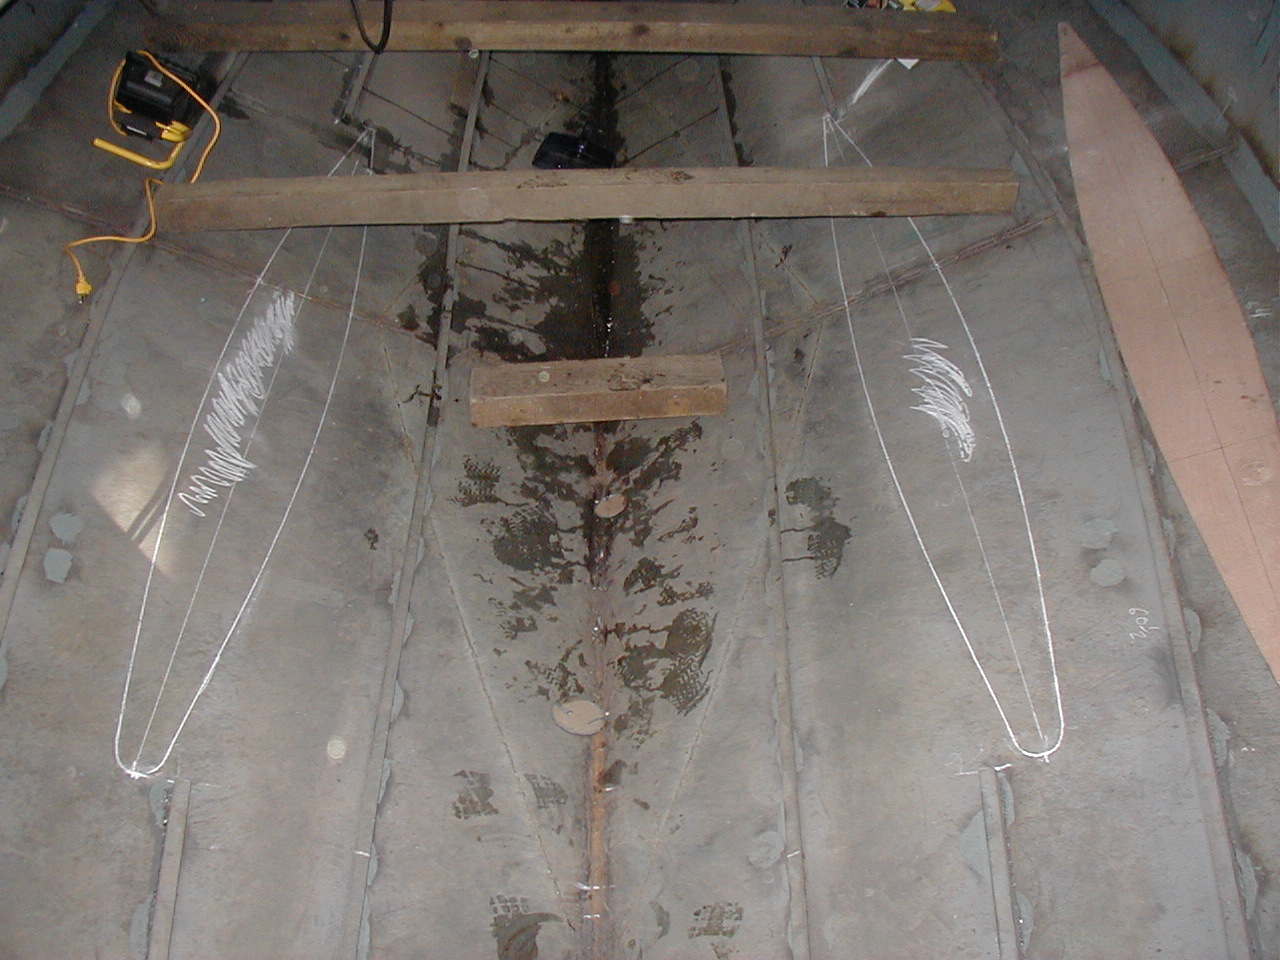
The rainy day projects during this time were getting the front stem welded into the bow. This is a 2" wide piece of 1/2" plate welded on edge into the centerline starting at the bow and running down well under the waterline (it still has almost 3 feet yet to be welded in). Also the mast arch was cut out of the 1/2" plate and fitted into the cabintop. It has two pieces of 2" pipe carrying the load down to the chines of the hull, again with a doubler plate on top of and under the pipe. Here is a nice picture of the completed mast arch assembly.
With some dry weather the chainplates were next on the agenda. Eight of them were cut from a piece of 1/2" thick 316 stainless steel plate, 3/4" holes are drilled into them and then they are welded onto the bulwark pipe at the appropriate places. Now we go to work on the side scuppers and cockpit scuppers. The side scuppers are for letting any large amounts of water that lands on the deck to drain overboard. One is at the mid-point of the boat where the beam is widest. This will be the low point when the boat is heeled over. The cockpit scuppers are openings at the rear of the cockpit floor through the transom so the cockpit can drain. There are stainless steel drip lips on the outside of the cockpit scuppers so water doesn't run down the transom causing staining.
The cockpit coming is laid out on the rear deck first. Then it is cut out & bent into shape. It will have a stainless steel pipe top cap so we bent that with a pipe bender to get a smooth curve. After placement of the comings are finalized then the last two scuppers are cut and welded into the hull just forward of where the coming will attach. Again these two scuppers have drip lips to prevent staining the hull.
Two weeks later
The comings are finished with a piece of stainless steel pipe on the top edge. They will be welded onto the deck later.
Next we switched to building things out of aluminum. The six hatches and the companionway door are made of 1/8" aluminum sheet. Evan layed out the patterns and cut all the pieces from a single 4' by 8' sheet. Next was to have a sheet metal shop bend the edges of the hatches and door. I had a cross break put into the small hatches and the door. This adds strength to the flat sheet and gives it a little added finished look as well. After a quick check for the fit of the remaining parts of the hatches and door, the hinge pieces were drilled for the hinge pins and then cut out of some aluminum flat bar. They will be welded to the hatches and door later.
Doing more detailing out of stainless steel continues with the mast step getting laid out in some 3/8" plate and cut to shape. The rough cut pieces need a bit of grinding, which is my job on this project. After that, the finished pieces of the mast step look quite nice.
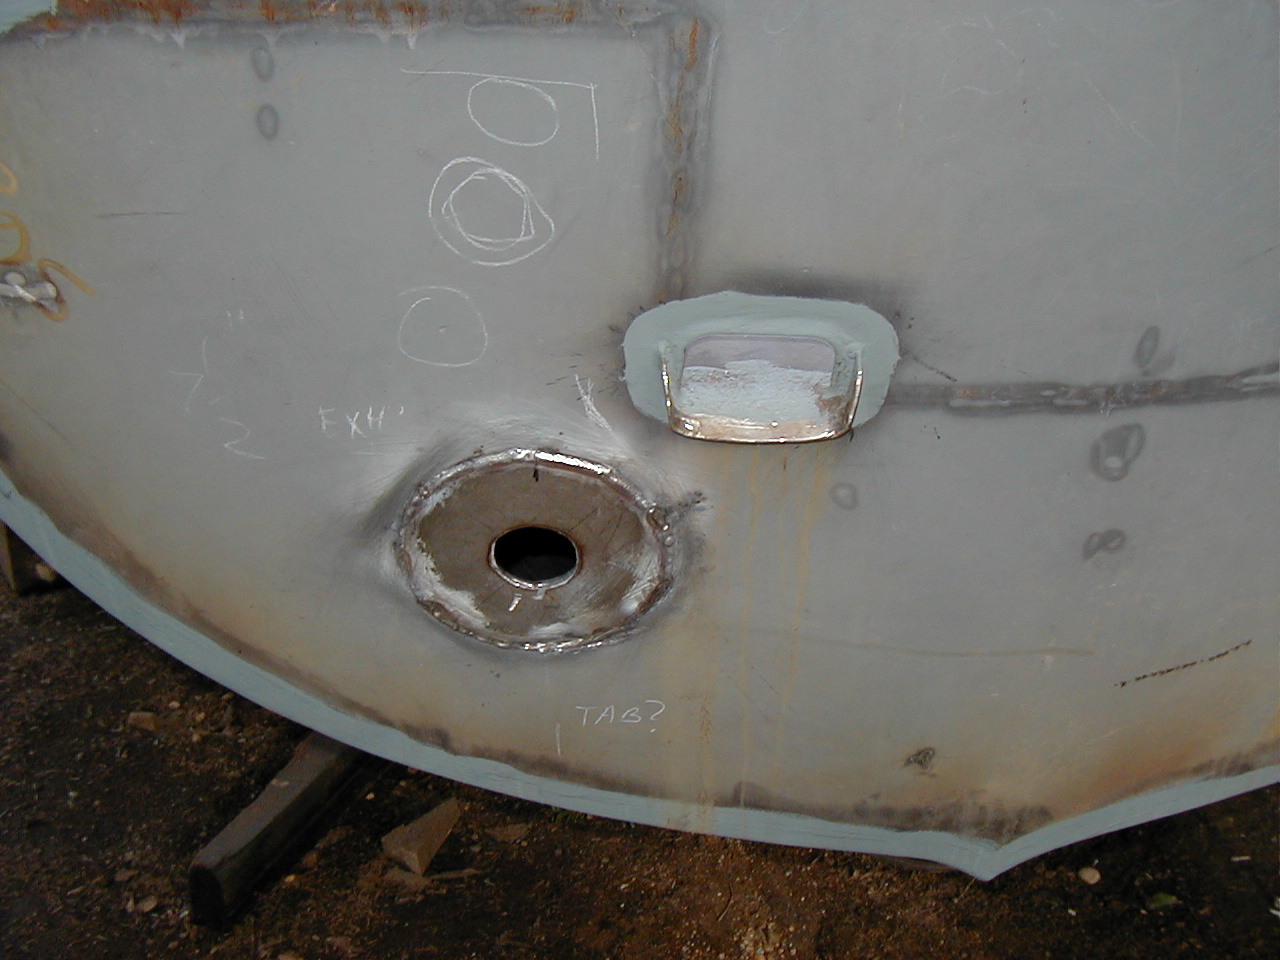
Evan wanted to concentrate on the thru hulls in the transom to get them done before the boat is lifted up to place the keels and skeg on the hull. So openings were cut into the transom for the inside steering, bilge and exhaust. We will be using a dry exhaust so it needs a piece of stainless steel plate around the opening as it can't be painted very close due to the heat. Also the base of the mast step is welded on top of the cabin trunk. Here is a nice picture showing the mast step and the four small ventilation hatches. The exhaust pipe is 2" with a flange on it so the final piece can be bolted on and removed if nesessary. The bilge is 1-1/2" pipe and the inside steering comes out through a 1" piece of pipe.
Small items for the top of the boat were made during rainy times. Cleats for the bulwarks and the sheets are made and finished. Also a really great all stainless steel dorade design that Winston found during his world travels are what we are using on the boat. It is two pieces of pipe, one inside to other with appropriate cut outs and a grill made from 1/4 stainless steel round bar. Here is a picture of the large one for the head (almost finished) and some smaller ones for other ventilation areas (one built & others under construction).
I've been in Utah for most of March. In the week before I left there was a lot of detailing that was completed. The mast step is finished and the mast pit is layed out, bent up and its location is marked on the cabin top. This helps placement of the dorades in the cabin top. After all the dorades are completed they are installed into the hull. The mast pit is then welded to the cabin top and finished with some cleats. On this day Tony Lyons dropped by to talk about doing the interior finishing on our boat.
Now to the back of the boat. A number of pipe nipples are placed in the stern of the cockpit seats. These are for running electircal cables and tank venting. The two small dorades for the ventilation of the engine compartment are also welded in this area. Seems that the weather still wants to play tricks on the boat building as the first of March brought another snow storm.
Just when I thought that the mast step was finished Evan says "its a good place for some padeyes". So he bends up some padeyes and welds them to the mast step.
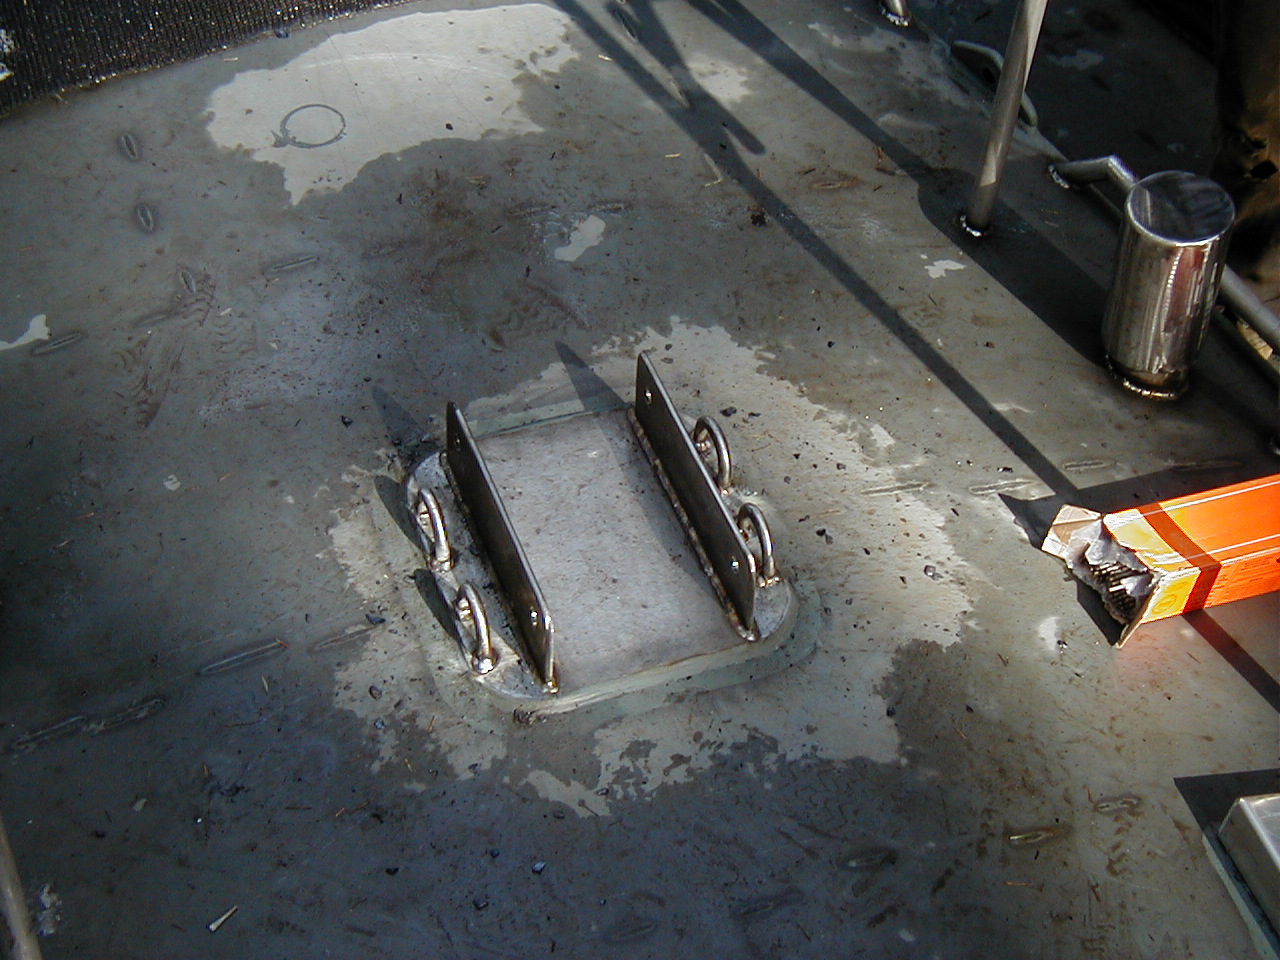
Now it gets real exciting as we start to get ready for the crane! A lifting eye is welded to the bow. Next the paterns for the keel cutouts are marked inside the hull as that will be the first thing after getting the boat lifted and blocked.
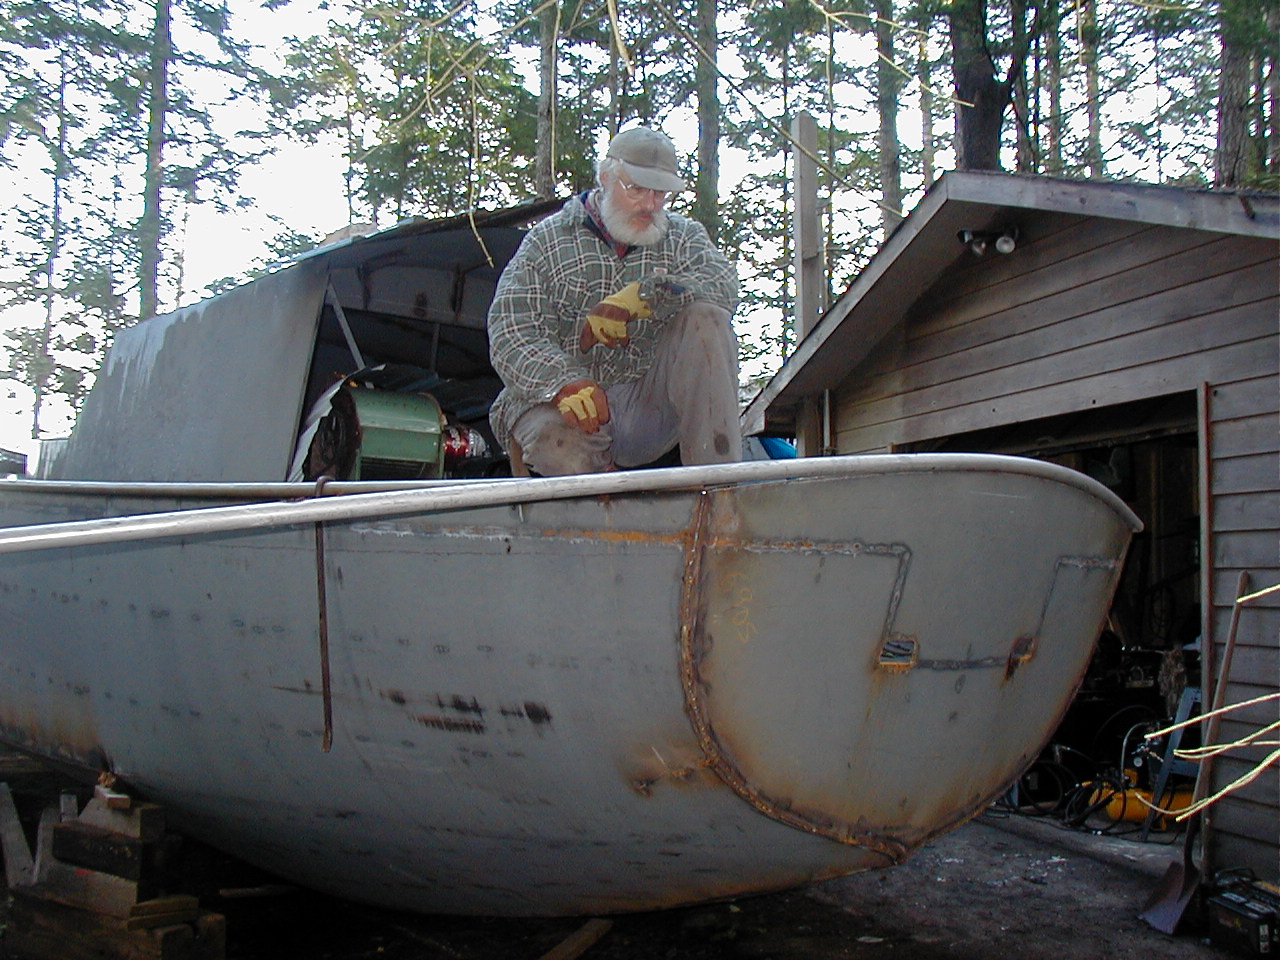
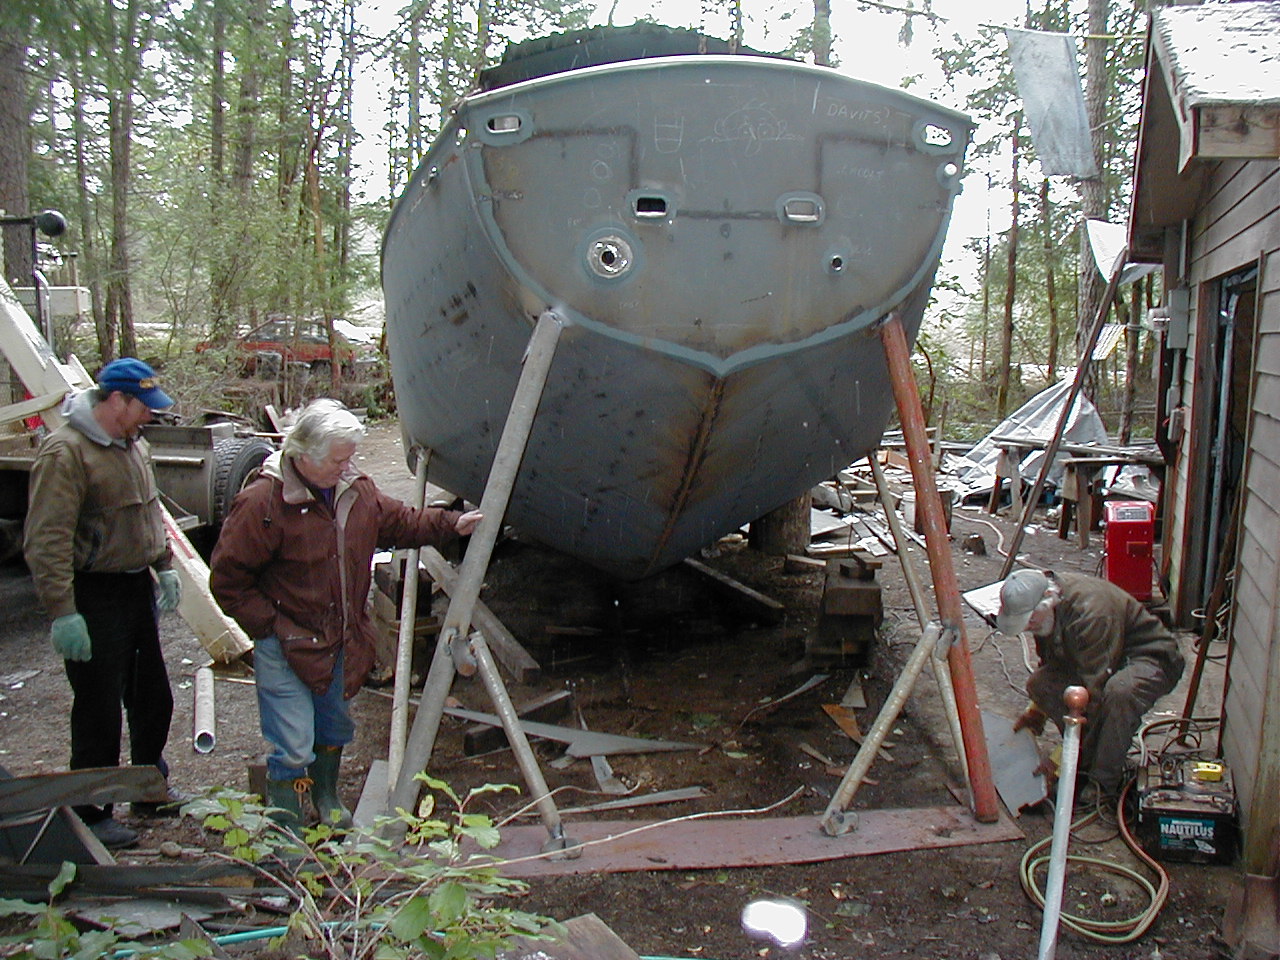
The next day Brian came with his "mid-size" crane and got set up to lift the stern first. Evan had to construct a brace system for the rear that would give enough room for us to work on the skeg and underside of the hull. Byron dropped by on this day and lent a hand with all the things that needed to be done. Here is picture of Winston and Byron coaching Evan on the bracing construction. Once the back is stabilized, the front is lifted and blocked with timbers.
Cutting the keel openings was done next on the newly lifted boat. First the starboard keel opening is cut and then the port keel opening cut second. After that it didn't take Evan long to get the starboard keel pulled into the hull and aligned to the hull plate. Once properly aligned, the keel is wedged out and tack welded to the hull. Evan stopped here and left one keel cutout open so I could move the lead into the hull without having to go over the top.
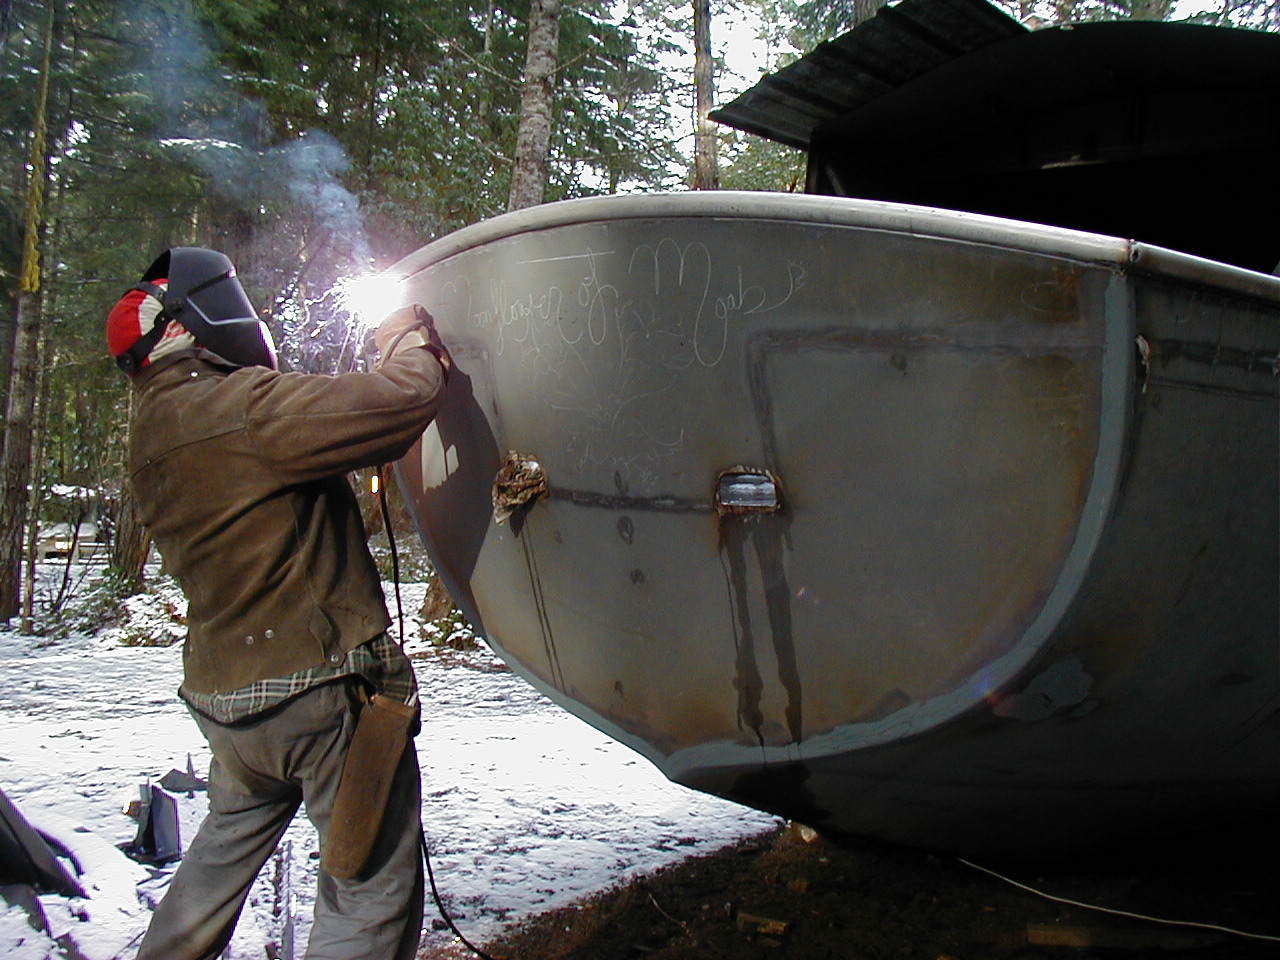
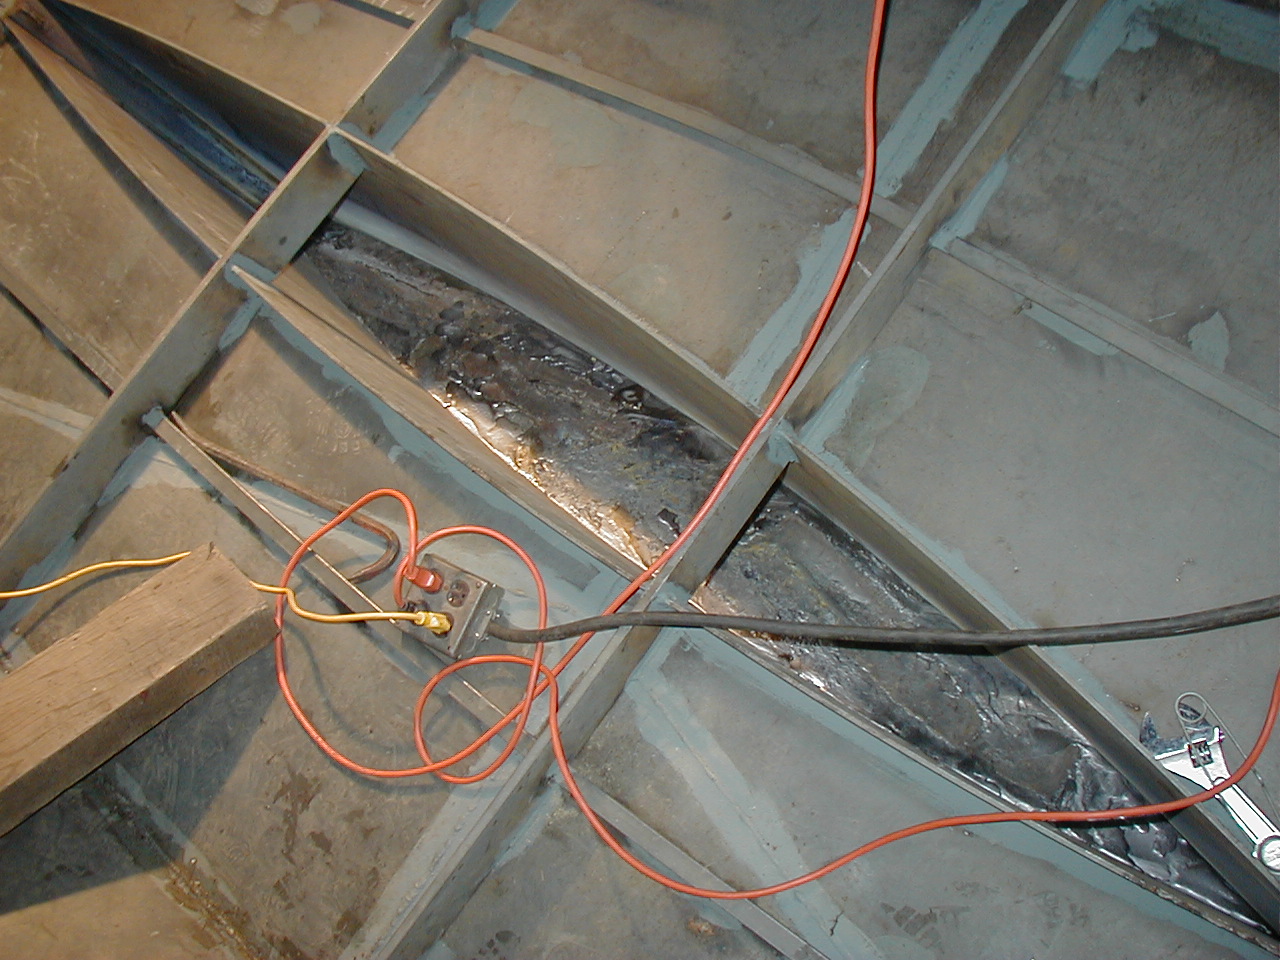
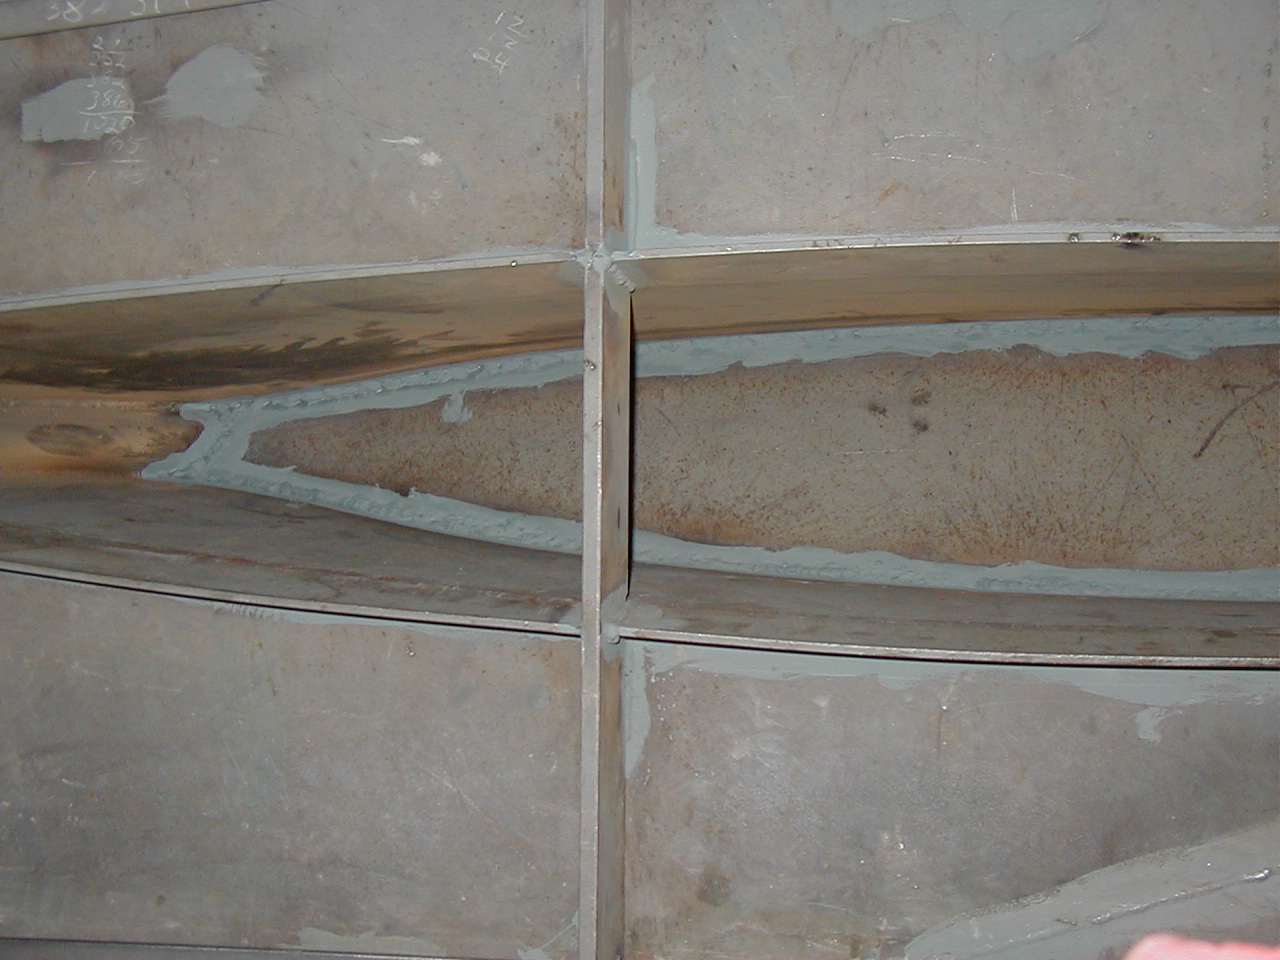
At this point is when I left Vancouver Island and returned to Utah for 3 weeks. While I was in Utah, Evan continued working and took a few pictures of his progress for this web site. He got the port keel installed next. Then the interior bracing of the keels was cut and fitted. This is done with 1/2" X 4" flatbar and has doubler plates on the ends near the chine. Next he fitted the skeg to the hull and aligned it to the centerline of the boat. Then the skeg leading web is cut and fitted to the hull. The finish welding on the hull outside is completed at this point and there was a LOT of it to do. Also welding the inside keel webs is completed at this time.
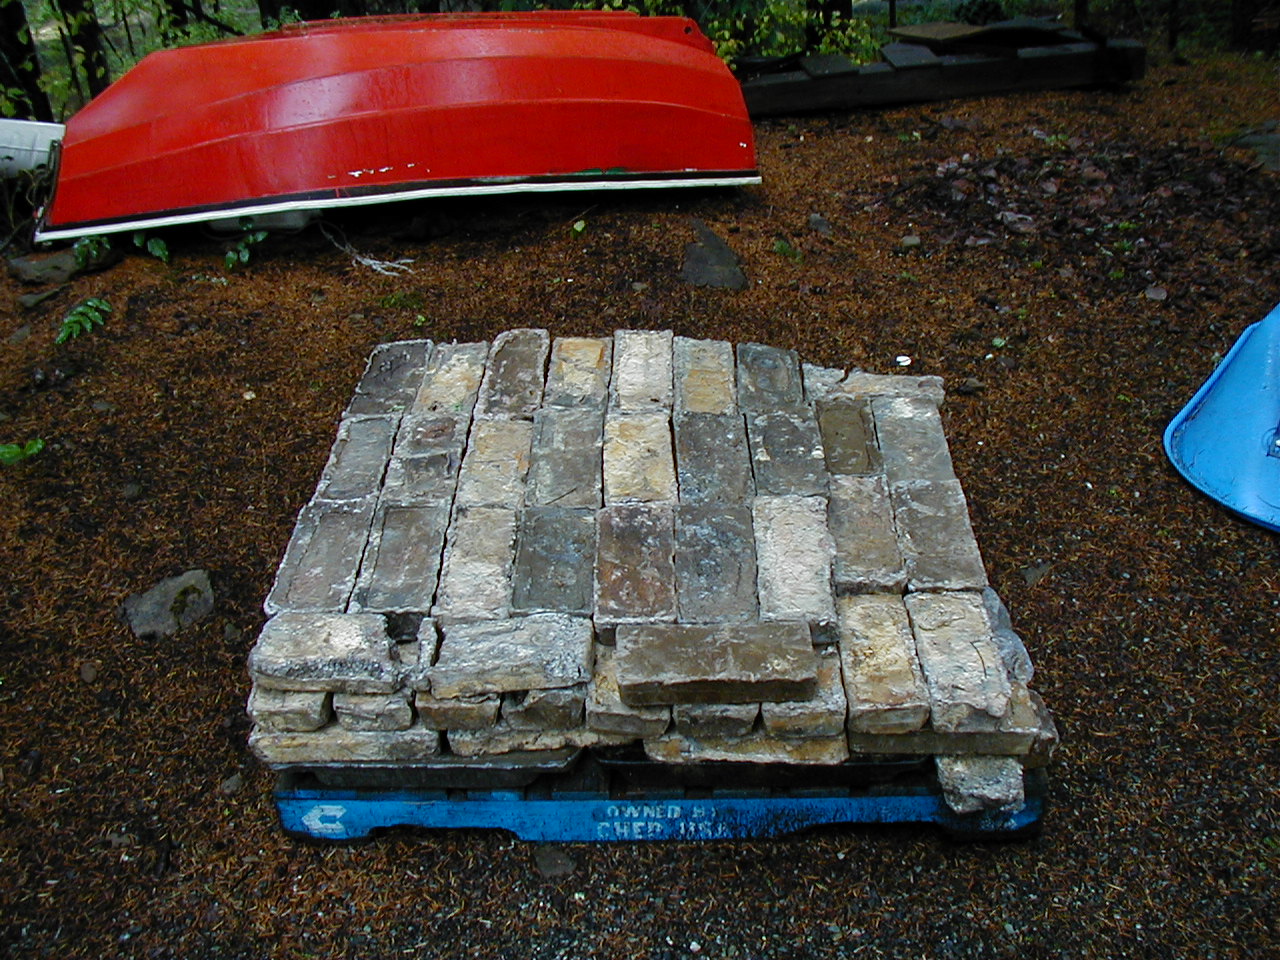
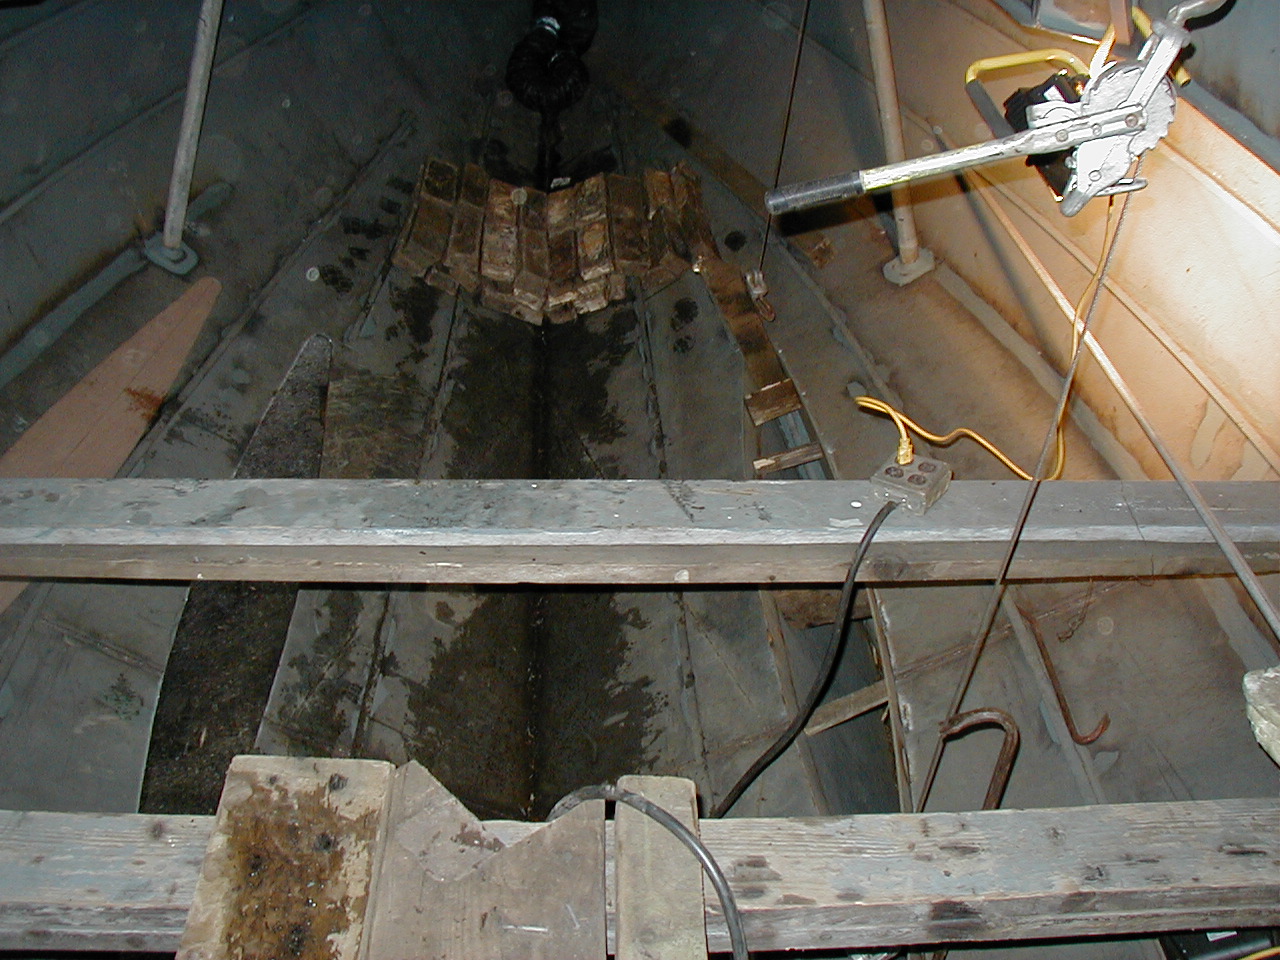
Getting back to working on the boat now. First was to decide the angle of the stern tube then cut out the prop aperture. Evan and I worked out a unique way of fairing the aperture and keeping the welding area on the stern tube to a minimum to eliminate distortion there. While Evan worked at welding up and grinding the prop aperture & stern tube area, I ballasted the keels with lead. I stacked lead bricks into each keel while keeping track of the weight of each brick. There was quite a bit of variation to the weight of each brick. Some of them were as small as 30 pounds and some were 75 pounds. After stacking each layer (and cutting up quite a few to make smaller pieces) I melted the layer with a propane torch. Evan lowered the front of the boat to help make the lead stay more level as it melted inside the keels. This process went on for three layers.
During this time Evan was working on getting the "plumbing" in the skeg. The skeg is used as the radiator for the engine so it has some piping for the coolant to run through. Finally after melting the last layer of lead, I capped each keel with cement to provide a smooth even surface for placing steel cover plates on.
Evan put together the bow roller assembly while I was busy with the cement. The finished product looks really nice. This was Easter weekend and Brent Swain was in Nanaimo so we met him (an a lot of others) for breakfast then took him back to the boat for a look at the project.
Next we capped the plumbing to the skeg so we caould pressure test the skeg for any leaks. An air fitting in the drain plug worked for putting about 5 pounds of pressure inside. Evan applied soapy water to every welded seam on the entire skeg and all fittings marking areas that had pinholes. He stated that he has never seen one not leak the first time it was tested. After a little touch-up welding the skeg was pressure tested again.
With some good dry weather the installation of the bow roller came next. Evan cut out the bow area for the roller and fitted the assembly into place. After welding the bow roller assembly to the boat some pieces are added to the sides to keep from having any tight little areas that would be hard to do maintainance on. After the final pieces are added to box it in the finished installation just looks great! Continuing with the bow area the "cheek plates" are patterened and cut out for fitting onto the bow area and a length of 3/8" stainless steel rod is welded to the outside of the stem.
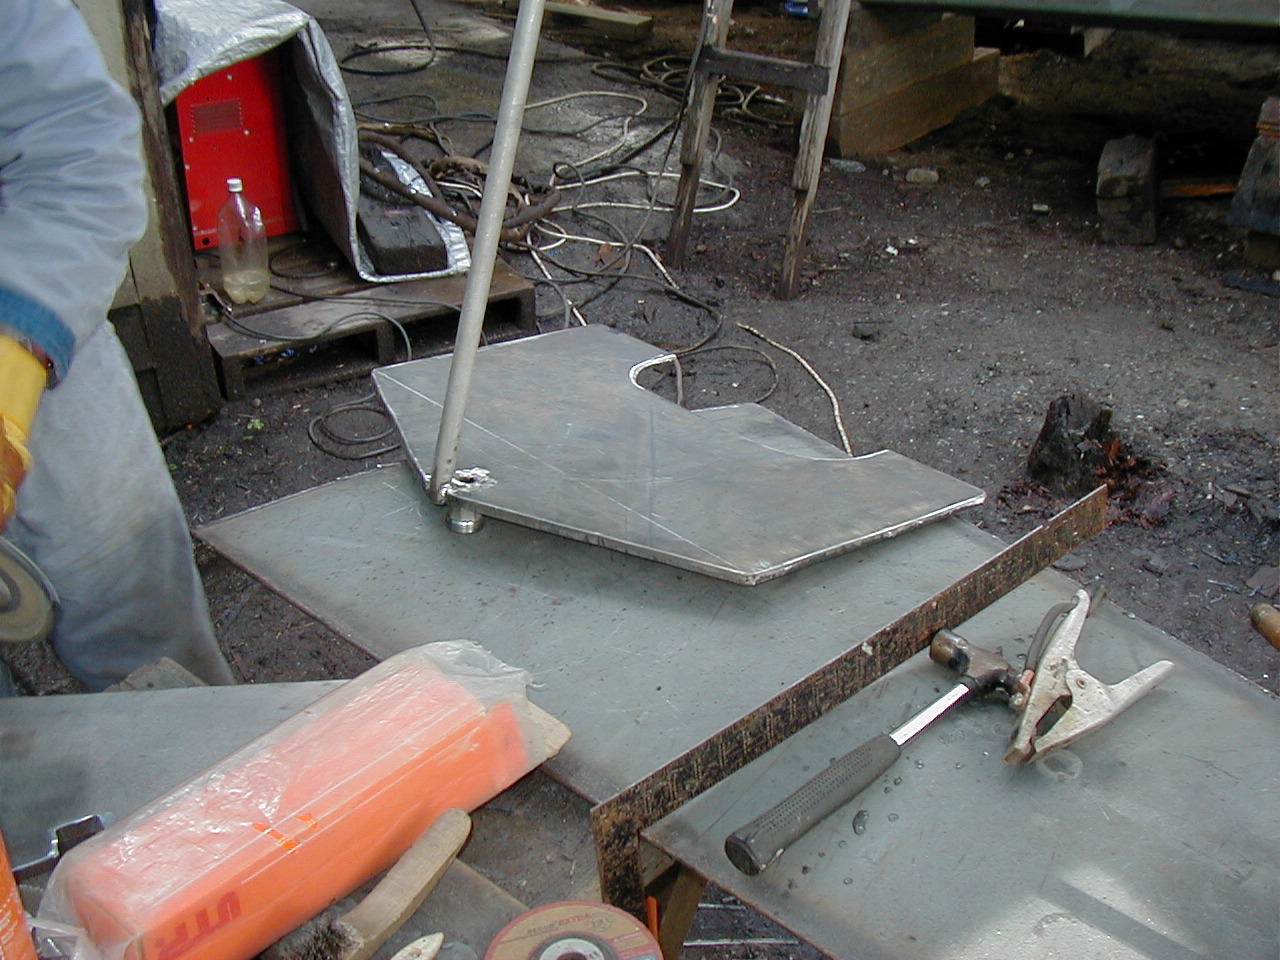
Next is the engine bed. First the placement is layed out inside the hull follwing the thrust vector of the stern tube. After measurments, the bed is tacked together and test fitted before tack welding to the hull. Then the front of the bed is cut out of 1/2" plate and all nessessary plumbing is fitted. This is required to create a "engine catchment" under the engine and transmission that will keep any leaks from entering the bilge of the boat. The bed webs are then fitted and tacked to spread the load over all the longitudinals in the bottom of the hull. The aft end of the bed and webs are cut and fitted along with a small piece that completes the engine catchment area. Now everything is tacked into place and the final welding is a "rainy day" project.
With good dry weather the "cheek plates" are welded to the front of the hull. To finish off the front of the hull the stainless steel anchor chain wear plates are fastened down. This makes the entire area between the bow roller and the anchor winch protected with stainless steel!
Turning attention to other little details that need to be on the boat the "shephards hook" is made and installed on the top of the cabin trunk for a way to route electrical wiring from the mast to inside the boat. The pieces for the hatch hinge pins are cut and drilled. Seems like a lot doesn't it! Well there are 28 of them as each hatch will hinge in at least two different directions. Evan then spent a good deal of time doing the finish welding for the engine bed. After preping the welds and applying primer here is a great shot of the engine bed completly installed in the boat.
While Evan assembled the hinge pins in a custom jig, I had a go at cleaning out and preping the fuel tank that I am recycling into the boat. It is a tank that I used for river running on the Colorado River. It is very heavy walled aluminum and just the right size for the "day tank" on this boat. I wanted at least 15 gallons capacity and this tank measures out at over 18 so it will work out very well. Here is a shot of the finished hinge pins (after I ground a camfer on the end of each one). Evan was tacking the tank support structure inside the boat while I was busy and here is a view of the test fit to make sure we had room for the foam and the fittings on the top of the tank.
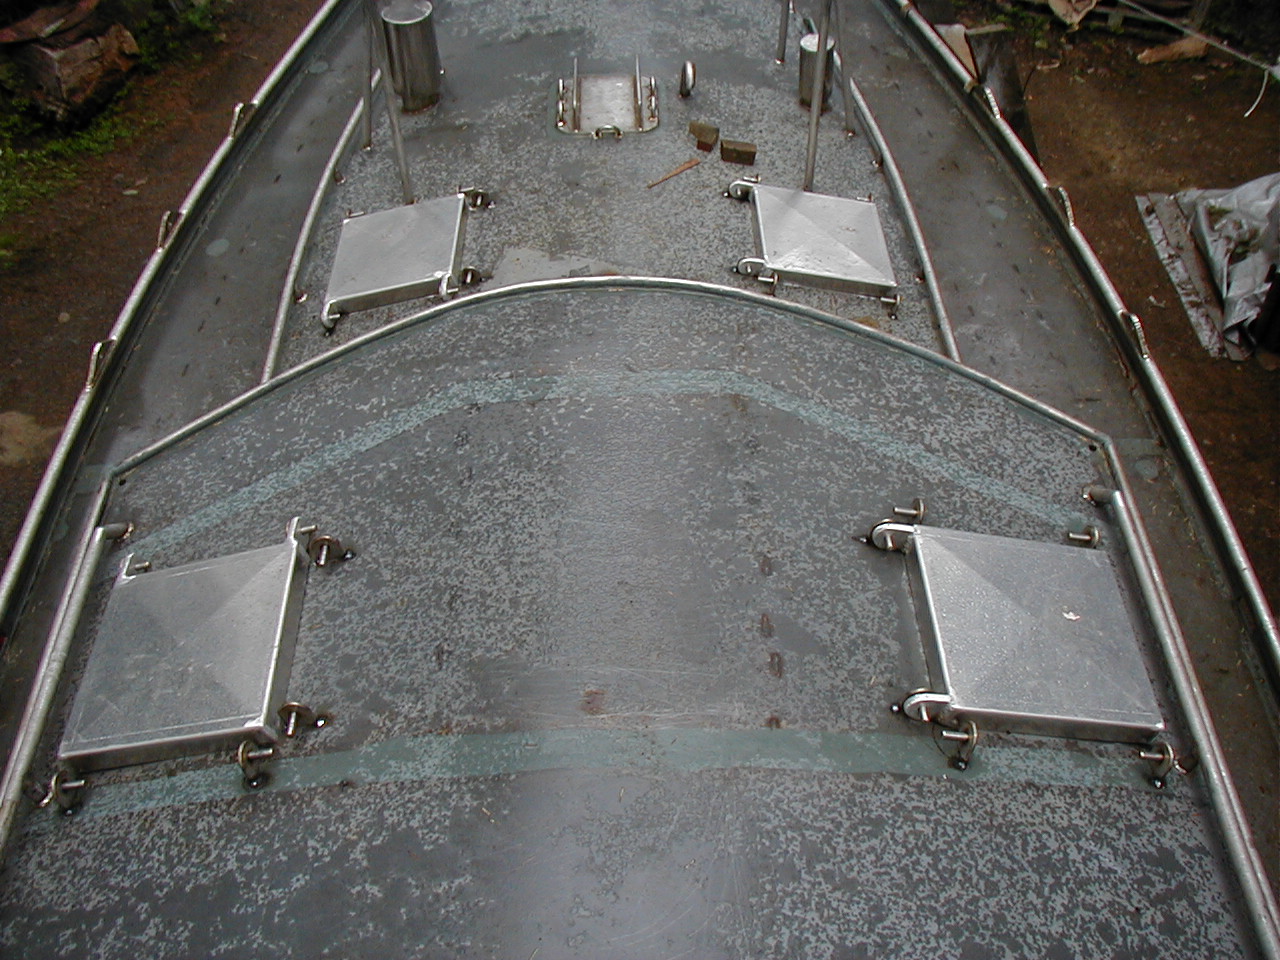
It had been a beautiful sunny day so far but nothing brings on rain here in the northwest like working outside. As soon as Evan started fitting the hatches and pins together you can see what started. In this picture you can see what I meant by the hatches hinge in different directions. The small ventilation hatches have 3 different ways they can hinge depending on the wind direction and whether you want them to let air in or exhaust air out.
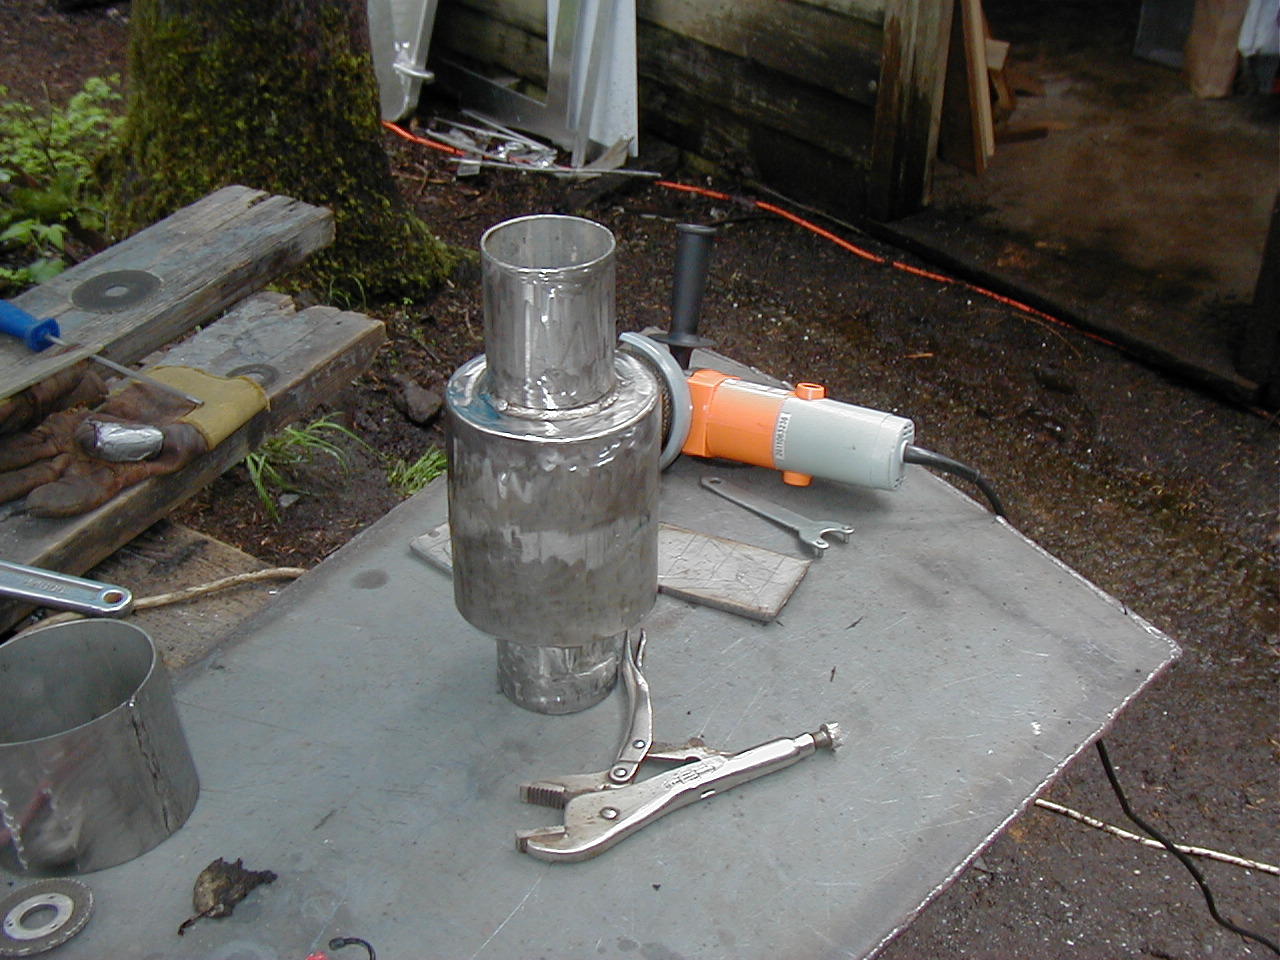
Doing more detailing of the boat, next came the exhaust vent for the diesel cabin heater. This started with making some custom diameter stainless tubing. Then one end of the inside vent tube had to be flared out to accept the stove pipe from below. Finally after welding all the pieces together, you end up with the finished heater exhaust vent (with a little polishing from myself).
Evan wanted to get the forehatch fitted next. Again you can see what I mean about having hatches hinge in different directions as the forehatch will be able to open to the front or rear of the boat.
Kate arrives from the States [Utah] Monday, June 4th. We had a little break and saw friends on Orcas Island before coming back to the boat building site. Once in Sidney, Van Is., BC, we went to Sooke to check out the facilities for possibly finishing the carpentry work come summer of 2008. There we met the mastmaker who lives on a Brent boat there in Beecher Bay. It was beautiful there and thoughts of spending time working on MOM for a summer were not so bad! He was building a beautiful aluminum mast in his shop. He is another great craftsman we've had pleasure to meet.
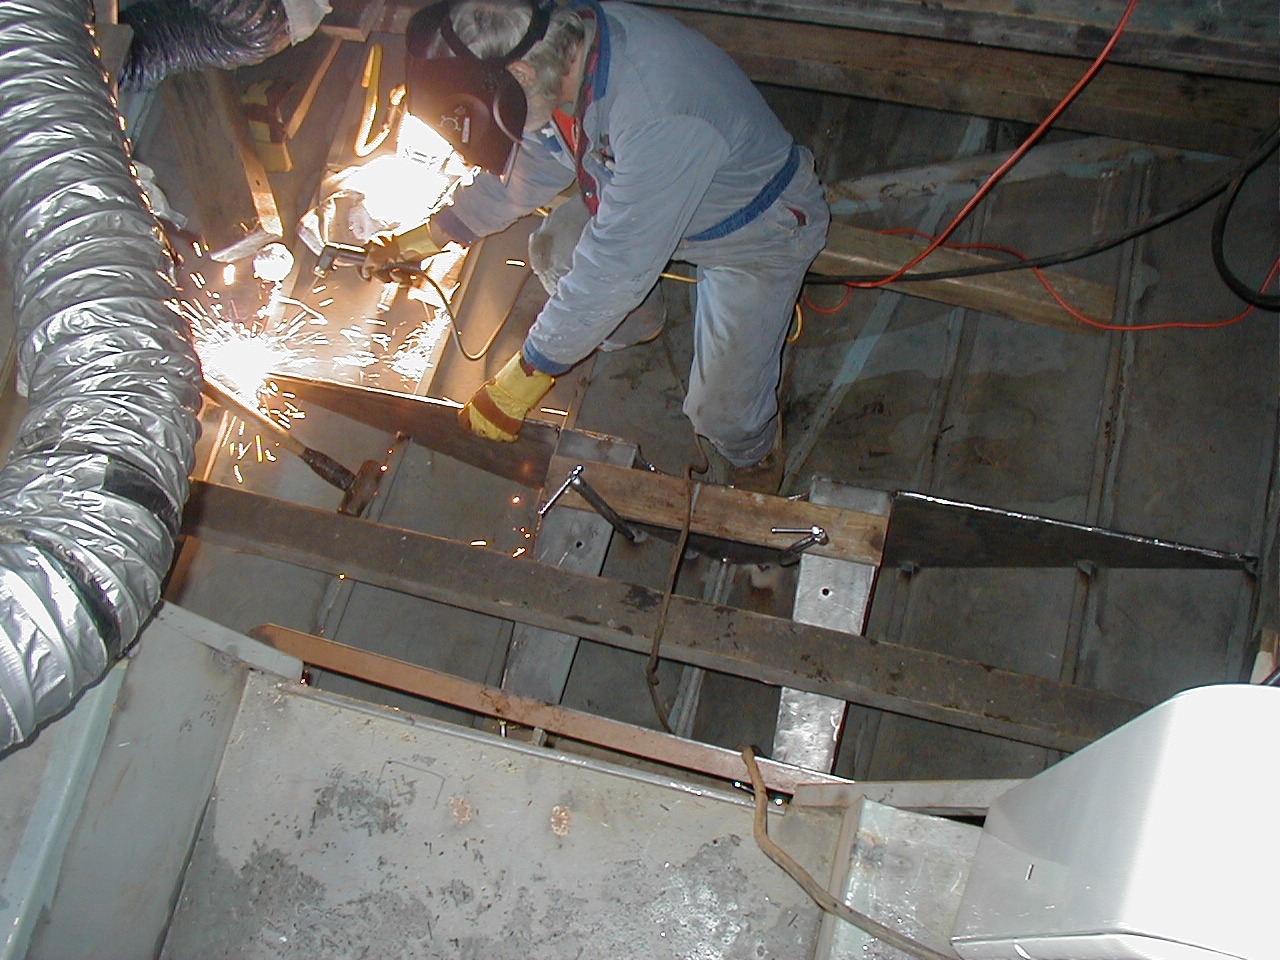
When we arrived back at the MOM building site we started right away. Carl showed me [Kate] to the wire brush and said, do these welds then brush on primer. It was scary all this metal flying around and that night I declared I would not be doing that again. However, in the morning, I was back at it.
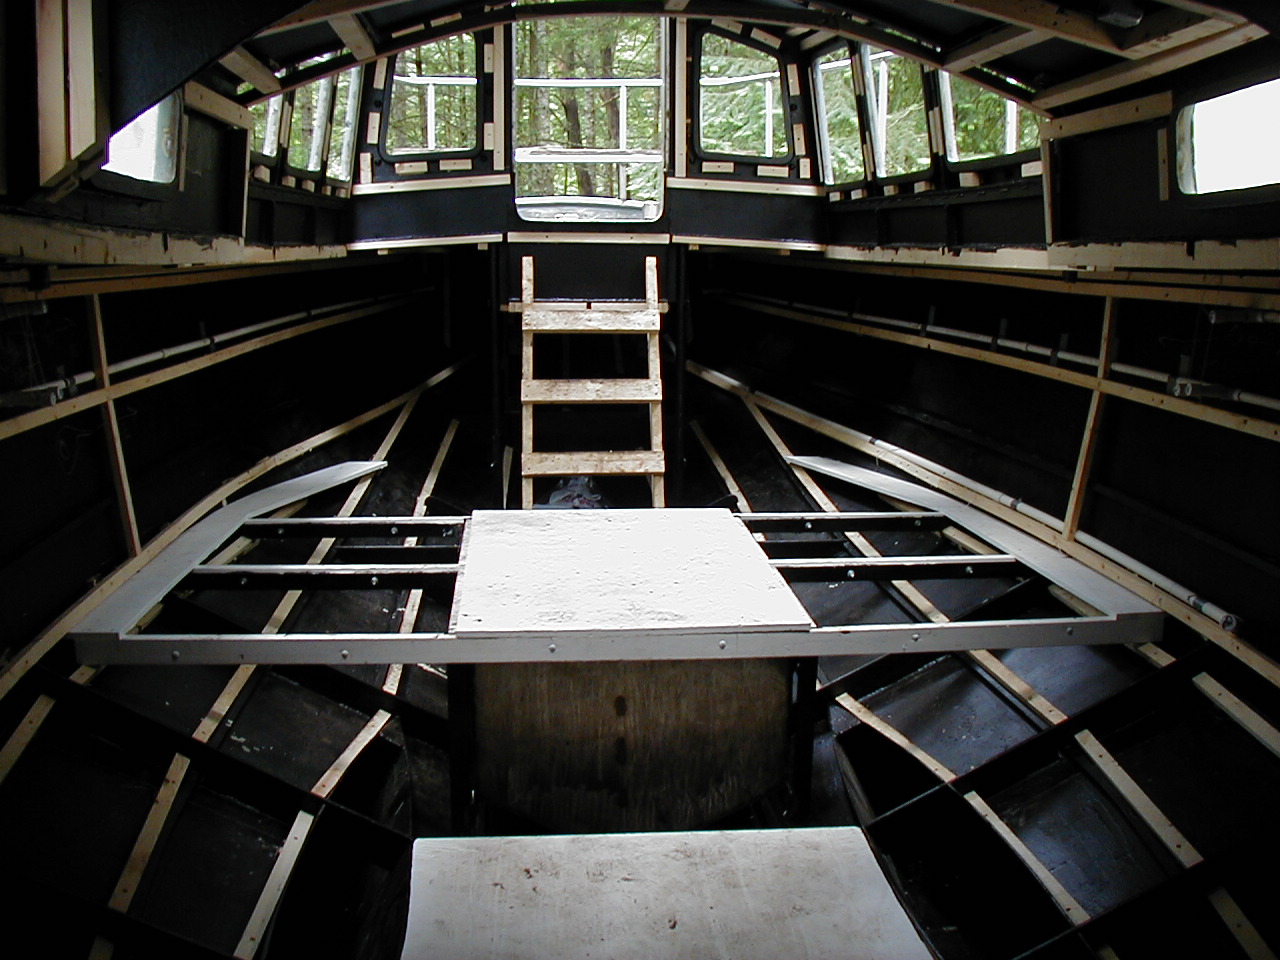
TABS for the wood furring strips before foam insulation
Carl had to fabricate over 500 tabs with holes in them to weld to the hull to attach the wood to before foam is applied. First he cut out of plate several tabs after he drilled the holes. Some he had to weld into angles for places in the hull with no angle iron to weld the tabs to. Claude, from Alberta happened by and said he'd help. He really screamed thru on the holes and spent a whole day grinding them to the shape they needed to be in. Thank You! He saved us an entire day of work! He also fixed our ladder several times as it kept falling apart. Thank Heavens for our little guardian angel who happened by only interested in the prospect of building a Brent Boat! These tabs take a LOT of work. Once you cut them out, after you've drilled the holes, you then have to grind them into a certain shape and then weld them all thru the boat.
Acorn Nuts We welded in 114 acorn nuts [316 stainless] all over the deck and pilot house. Some will attach our seat in the cockpit. Others will be places we can attach the solar panels. A few for jack lines, and many for the possibility of attaching storm shutters to the windows if/when we go off shore. We thought we'd use a Mag Drill that didn't work, then a Hole Hawg, that didn't work then Evan said "oh, I can just cut them out with the Plasma Cutter." He was done before you knew it! Every time Evan put in another nut, Carl joked he was tacking on another $5 bill. We brought 100 nuts, but needed 14 more. These are $7 a piece in Canada! Thank heavens we only need 14!
Priming the inside and preparing for foam
We have Wasser primer and then we'll do black tar. We first clean the interior with vinegar. WOW, that stuff can clean but watch out you can't let it sit too long because it starts to eat away at the metal. Let that dry, then rinsed with water. Then dawned our matching TYVEK suits [ain't it romantic] respirators, safety glasses and climbed inside. This was an arduous task BUT everything with this boat has been! Not only do you have to get into every nook and cranny with this nasty toxic stuff, but you have HUNDREDS of tabs you need to make sure you get in and around, inside the hole, etc. It's like a porcupine in that boat! You'd be surprised at how many nook and crannies there are!
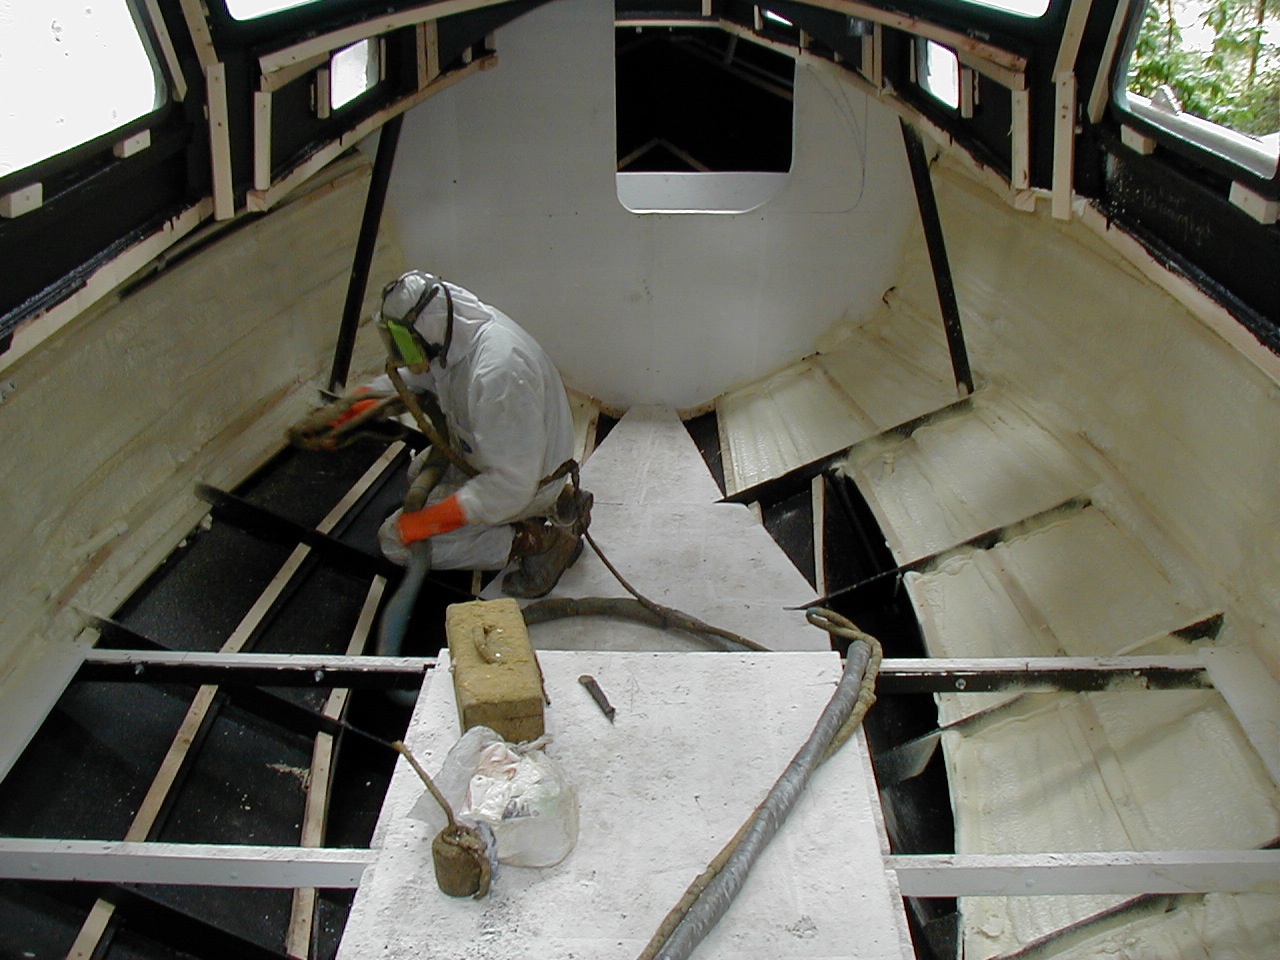
It was difficult finding a person who is willing to travel to do foam insulation. We hope Roy from Independent Shipwrights in Coombs will come next week. Like everything on this project, people told us they had their boat foamed for $1400 but it's gonna be close to $4K! Ron said there's a meter that shows how much we use and the price is based on his time to come here and the amount of foam we use. Frederick of SV Idedifix said the nastiest job of all was scraping out the 20 garbage bags full of extra foam out! and this we've heard over and over.
Windows
Garibaldi Glass in Vancouver. Carl stopped there on the way to Utah in May to give them patterns for our glass. Carl had already talked to them about making them. However, when he brought the patterns and discussed it with them and they said, "We're used to doing more quality work than this." Poor Carl who'd worked his heart and soul into MOM and now this guy dis'in' our boat! I would have said "Yeah, we're trying to class it up a bit with YOUR windows!" Carl said they build the ferry windows and 100 ft. yachts, etc. Our theory is that he's never seen a steel boat under construction and when Carl showed him the website this guy looked at this wee boat all burned and grey he thought "this is a piece of crap why do they want these good windows?" When we called the next week the CAD guys already were working on mocking them up so it was looking good. These windows are insulated, ¾ inch, recessed tempered glass. They'll be done after we have the boat painted in July. Not cheap, but worth it. We look at these Brent boats all over and they have this ticky tacky plastic lexon scratched up stuff glued on the sides. We wonder why you'd do that once you've worked so hard on a project like this. Guess the plastic window crowd wonders why we'd pay this much well, we'll be able to look out for years of enjoyment.
Saturday, June 23, 2007
Today is the Ladysmith Boat Festival. It was that festival last year that we met all these wonderful cruisers that would come to be instrumental in the building of MOM.
I am only sorry to say that we can't participate in the festivities this year since we're priming plywood, figuring the conduit before she's foamed, hopefully at the end of next week, and a sundry of other QUIET things. We had Tony here so close yet so far when for fear of the neighbors complaining of the noise on the weekend, we sent him home. We cannot work on the weekends. Our project will be set back hopefully not too far for I have no choice I HAVE to be back at work in Utah in August.
So we'll prime the plywood using shellac, we'll coat both sides then we only have to do the end pieces once Tony measures and sets them on the floor of the pilot house and cabin sole.
We'll also place our conduit pipe for wiring and figure out where that all goes so that it can be placed pre-foam.
We have made all the measurements to place plastic PVC pipe over all the handrails for sand blasting the exterior. We thought we might also get a head start on taping off areas where we don't want sandblasted.
I am going to get sandblasting material called, "Resist" to place over our stainless anchor plate on the bow to keep it shiny. I plan on cutting out a design into the "Resist" which is a rubber mat that adheres to the steel. The design will be a moonflower on the Port side and Delicate Arch the symbol of Moab, Utah, on the starboard side.
June 29, 2007
FOAMED!
Roy from Independent Shipwrights came today and insulated MOM! When he arrived he said he didn't have enough chemical to do it BUT low n' behold he just made it! I said you've got to expect a miracle everyday and those who build boats are eternal optimists. So she's FOAMED! Now our job ahead is to trim back the foam with a various type of kitchen knives, hand saws and chisels, to the wood strips which at this point doesn't look like it'll be too bad. We'd heard this can be the worst part of this job of building a Brent Boat. We've heard from 2 to 20 garbage bags of excess foam coming out of these boats. Roy did an incredible job and we thank him profusely for his expertise!
July 1st is Canada Day!!!
NEXT:
Sandblasting:
Ron, of R n D Sandblasting has said to call him Monday July 2, to see how the weather is for blasting. You must have at least 2 days consecutively to paint after you've had the boat sand blasted. We may have it done next Tuesday maybe later, weather permitting. We're moving right along it seems.
We have a launch date. We'll be at Newcastle Marina for a Travel Lift in on August 3rd by 9 AM. We need to have her to Lopez Island, San Juan's by August 8th 3 PM for her ride up on "the hard" to live for the winter.
July 15, 2007
Whew! We've never worked so hard in our lives! If we'd had music blasting to the last 2 weeks of work on MOM it'd be the last crescendo of the Beatles tune: "A Day in the Life".
Let's start with the last time we saw MOM
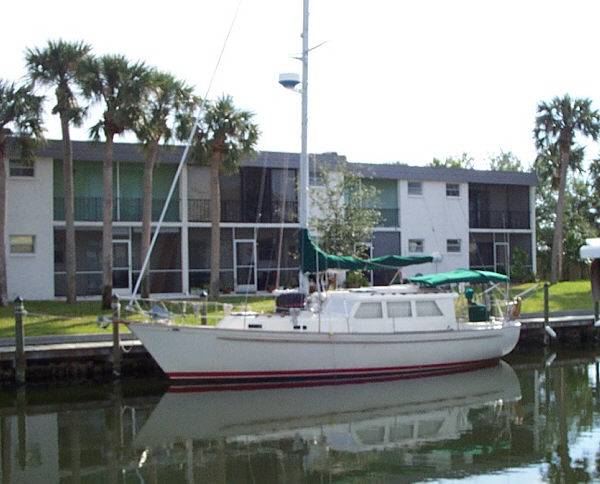
She's on the "hard" now until next spring. We needed to come back to Utah to replenish the boat fund BIG TIME! It was so hard to leave her after 4 nights of bliss being on her on the water. She's by no means "done", but she was great to live on even at this stage. With the huge pilot house, there is SO much room! It's wonderful!
Next spring we hope to take her back to Canada to have a pro build our mast. I want a Crows' Nest, too. I can't wait to see Tony, the Shipwright come back. Maybe we'll get our dinette and beautiful wood floors. He will finish the galley with drawers aft of the stove. We'll build an ice box/ refrigerator between the sink and the stove. Not sure about having a quarter berth since I'd like BIG storage in the aft area next to the engine the other side with the big exhaust pipe we'll put in our wet locker like Idefix has. Carl had a good idea to put tool storage under the deck behind the steering station. Ok, that's all in the future here's how the last few weeks went on the project starting with the.
Champagne Launching August 3, 2007 at Newcastle Marina
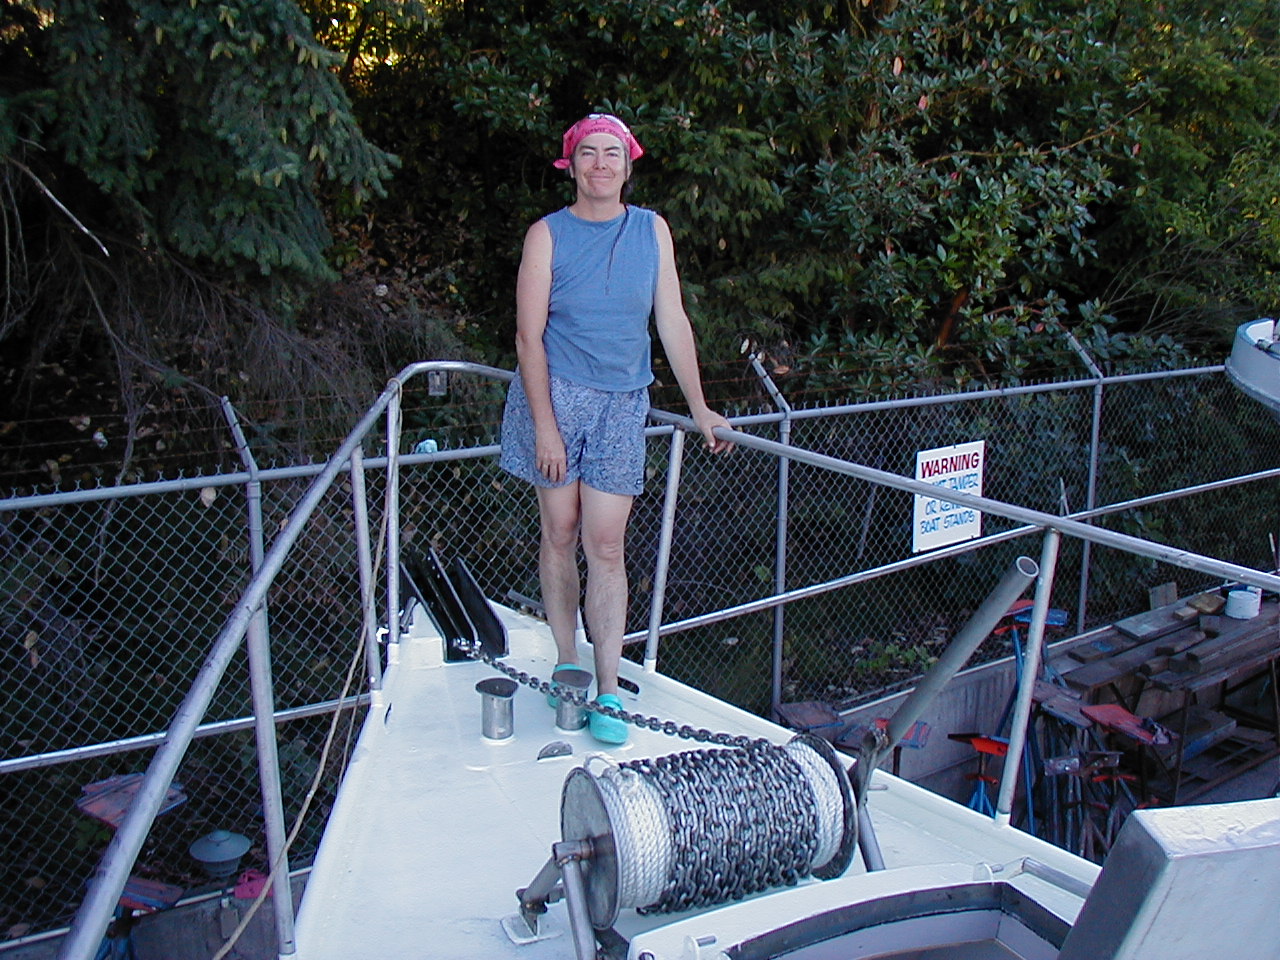
This was as close to a birth as Carl and I will ever get. All the people who had seen us working like crazy for the last week in the yard came out to see her. Gerald, the travel lift guy extraordinaire, hung MOM out over the water while Carl and I sprayed Champagne on her bow. Then we all had a glass and toasted her touching the water for the first time. It was SO beautiful! Carl went down from the shore with her to check for leaks and dry dry dry! I was just jumping up and down. It was so exciting! Now our dreams were really coming true!
First trip around the Nanaimo waterfront with Evan and Tony! We went out around part of Newcastle Island, then through the anchorage. It was SO fun. We saw 2 other Brent boats Dar Mi and another. All went well EXCEPT we still had the air lock in the motor somewhere and "Suzie" over heated. Be sure to follow start up procedures very closely especially with the coolant when starting the engine. In fact, the last little time we motored her to her winter home was the first time she didn't over heat. Finally the air lock had pushed thru. Carl had removed the thermostat for the drive down to America. It took all that bashing around across Haro Straight before the lock seemed to unlock.
Ok, back to the countdown back wards.
The last week in Newcastle Marina we had Tony do the steering station, settee, and galley counter. We hooked up the propane stove and were able to cook on the voyage to America SO COOL! Everything's basically roughed in BUT the dinette is not there yet.
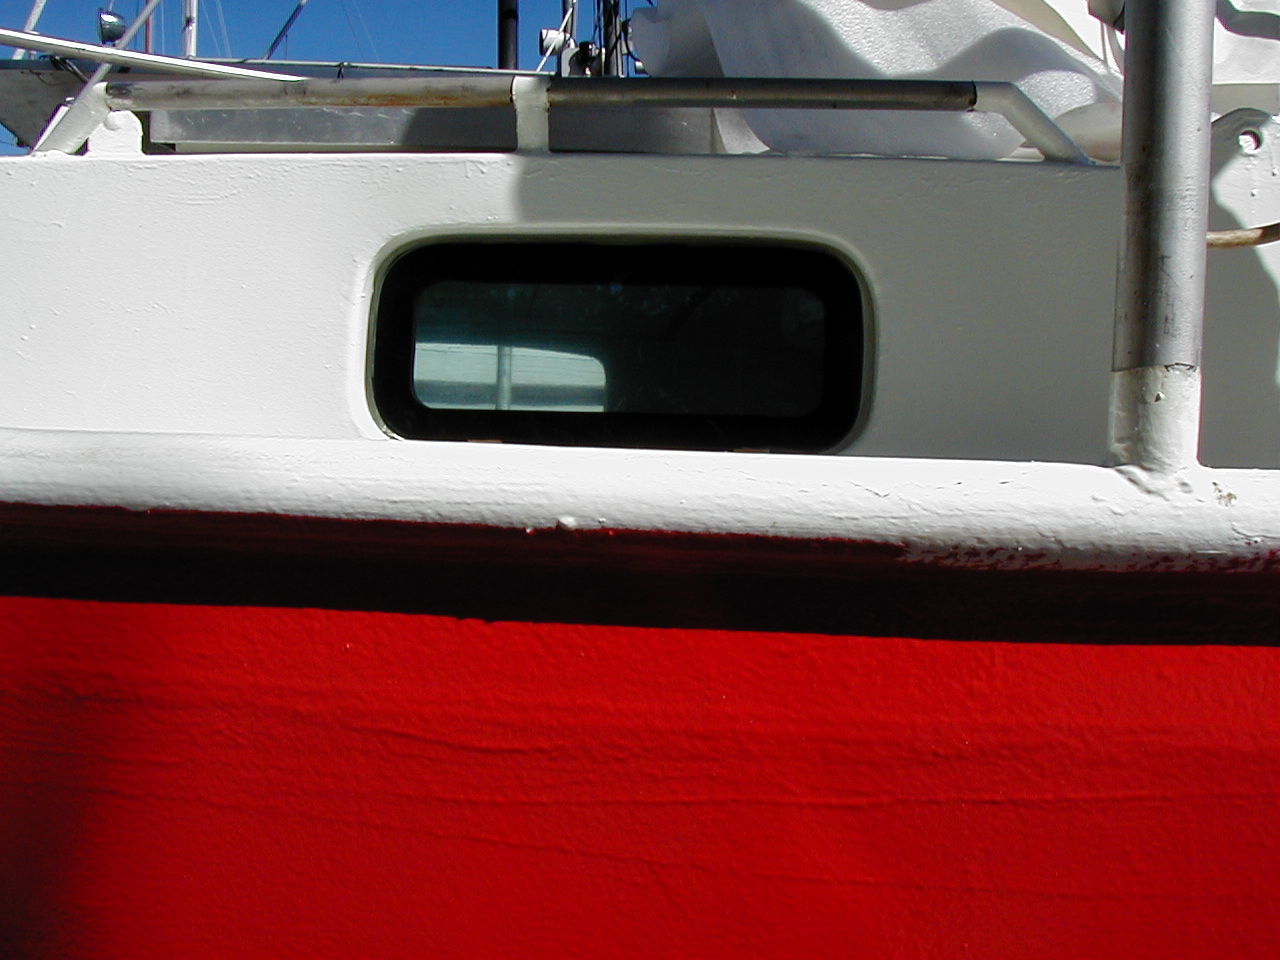
At Newcastle, Carl put in the windows from Garibaldi with SIKA adhesive. They are BOMBER! Insulated units with tempered glass. They are so heavy but wow, you couldn't hear anything outside because the boat is so insulated with the foam, then those windows. Once we put in the neoprene inside the hatches, it'll really be quiet inside.
We painted the primer, black, then red tar, then 2 white mid coats before the final Marker White on the deck. We'll need to so another one of those then the nonskid next spring. We also need to do the bottom paint which will be black next spring, and put on the zincs. We only had zinc on the propeller shaft and it was pretty beaten by the time we got to America!
July 27th: Moving Day.
This was a logistical nightmare! We had to have a BIG crane lift MOM, then put her on a trailer of another trucking company, take her to the sand blaster drop the trailer with MOM on it, go away. Sandblasted then primed [4 hours], come back, take her to Newcastle Marina. She was 3 inches under the Chase River Bridge and we just held our breath as she went under the bridge for we followed the semi to town! Whew! That was a SPENDIE day, needless to say! Carl joked that it was simply amazing to get 4 different Canadian outfits to coordinate at exact times. However, the day before I'd gone to the sandblaster who had already said he'd do the job 2 to 3 weeks prior, and picked him up to look at MOM. Later that day the boss drove out to the woods and said that this job was too small and wasn't worth their time to do. We had lined him up, I go get the kid who's gonna do the job the next day, tell him he can't take more than 3 hours to blast, 2 would be better, and now they can't be bothered THE DAY BEFORE! Carl said, "Well could you do the first primer paint after you sand blast?" So that cinched the deal for they wheedled another "C" note out of us that way. I was glad not to paint the first coat of primer after that day which we would have had they not done it. As it was it took 3 hours to peel the duct tape off all the surfaces we didn’t want blasted. The back spray from the sand did scratch up our life rail pretty bad BUT Carl said he can buff that out.
Up until Moving Day in the forest we had painted her hull and helped Tony rough in. Carl worked on the engine hooking up all the hoses, wires, etc. Evan had built the exhaust pipe for dry exhaust YEAH BABY! Finished another water tank and put that under the V-berth. The anchor winch is amazing and was finished and placed in those final hours in the forest.
We are especially glad we put conduit in before we foamed. Tony exclaimed, "Now that's a Hot Damn" when we slipped the propane hose from the outside tank to the inside stove through a large [I think 1 inch] conduit. We have conduit that runs from midships to front and again amidships to aft on both sides.
November 28, 2007
We have spent the last 3 months working in Utah and "scrounging" around for the items that it will take to finish MOM. After getting together most of the parts for the entire plumbing systems we decided to take them up to the boat over the Thanksgiving holiday week. This also let us finialize things with the mast maker who will be building the mast. So off we go on the 16th of November for a quick trip to see MOM on the hard on Lopez Island.
Got home Sunday from Lopez Island and a few days working on MOM. We'd gone to Vancouver Island to talk to the mast maker. We crossed from Port Angeles to Victoria on the MV Coho. Here is picture of our salvaged mast section that we will be using for a boom. It was a fast and furious trip but well worth it to check in on MOM.
While at MOM, we installed the sink and drain. Placed the Head parts we had and did a mock up holding tank of cardboard and fitted that all out. Put the fill hoses in place for the 2 water tanks and the big fuel tank plus vent hose for all. We started and ran the engine for a while. SUZI jumped to life and ran flawlessly for a half hour. This is the kind of thing that you can only do with an engine that has skeg cooling.
It was COLD and dark most of the time on Lopez. We awoke to an icy deck with no non-skid since we're not done painting the decks and cabintop. It was nice and warm inside with a space heater and a nice hot water bottle in the V-berth every night we were there. The last morning we were there I asked the Boat Yard owner, Ron, if he ever had stuff, "like Capt's chairs taken out from other boats he'd like to get rid of." He went up into the attic and came down with the chair we wanted in perfect condition! So we have our first "seat" in MOM!